Six Ways to Find 404 Errors On Your Website

404 Not Found: even if you’re not a web designer or a programmer you’ve probably seen this error before. But if you have been living underground in the disconnected world of the mole people for a few decades, 404 Not Found is the error code on the web that means you’ve tried to access a resource that doesn’t exist.

404 errors need to be dealt with. When a customer experiences a 404 it’s a missed opportunity for you and a bad user experience for them. When a search engine experiences a 404 error the missing resources could be removed from their index, and it could be translated as a signal that your website is unreliable.

But before you can fix a 404 Not Found error you need to know they’re happening. This article explore six easy ways to discover 404 errors on your own website.

1. Find 404 Errors Using Server Logs

One of the easiest ways to discover 404 errors is by utilizing your hosting environment’s access logs and error logs. Every hosting environment is different so unfortunately I can’t explain where to find yours, but a Google search should prove fruitful. Searching for “cpanel raw access logs” turns up a plethora of helpful pages for the CPanel hosting environment.

Your log files may need some massaging to be useful. Most are text files that can be easily opened in Excel and then filtered by HTTP response code.

The Pros: This method should show you all 404 errors that occurred on your site in the time frame covered by the log.

The Cons: Your hosting environment’s log files can be difficult to read and utilize unless you know your way around a spreadsheet.

The raw access logs from this website. These file contain lots of data and need some help to be useful.

The raw access logs from this website. These file contain lots of data and need some help to be useful.

2. Find 404 Errors Using a Spider or Link Scanner

This method doesn’t actually find 404 errors. It discovers broken links on your website so they can be fixed before they generate 404 errors. An ounce of prevention is worth a pound of cure.

An easy way to find potential 404 errors is by scanning your website with a spider or link scanner. A spider indexes your site the same way that a search engine like Google does: it starts with a URL and scans the code for links, and then works through that list recursively. There are lots of programs and online services that can scan your site for free, and will provide a list of broken links that exist on your site.  My two favorites are Xenu Link Sleuth and Screaming Frog SEO.

The Pros:

Using a spider to locate broken links on your website doesn’t actually find 404 errors: it helps prevent them.  By scanning your site, discovering, and fixing broken links you’ll prevent your visitors from visiting URLs that don’t exist and reduce the number of 404 errors that occur on your website in the future.

The Cons:

Anyone can link to your website, and you don’t have control over the URLs that they link to. Just because you fix all of the broken links on your website doesn’t mean that other websites, or even search engines, don’t have active links to broken URLs on your website. You won’t be able to discover or fix those using a spider.

A report from Xenu Link Sleuth. Xenu requests every URL of your site and returns the status code, among other things.

A report from Xenu Link Sleuth. Xenu requests every URL of your site and returns the status code, among other things.

3. Find 404 Errors Using Google Analytics (and Yoast SEO)

This one is a little WordPress-specific, but you can do a similar trick with other content management systems.

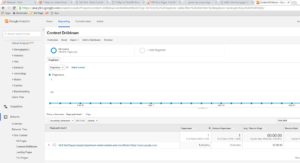
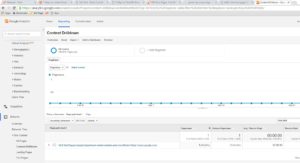
If you use the Google Analytics by Yoast plugin, it automatically tags 404 errors so you can find them in Google Analytics using the Content Drilldown tool. Just go to Behavior > Site Content > Content Drilldown and do a search for 404.html.

The Pros: 

It’s right in Google Analytics where you would expect to find this sort of data. Because it’s in Google Analytics you can export your list of 404 errors to do something useful with it, like construct a list of URL to redirect.

The Cons:

It’s WordPress specific. It requires you to install yet another plugin on your website to basically embed a few lines of JavaScript for Google Analytics.

Yoast SEO automatically registers your 404 errors in Google Analytics.

Yoast SEO automatically registers your 404 errors in Google Analytics.

4. Find 404 Errors Using Google Search Console

Google Search Console (formerly Google Webmaster Tools) provides a window into how Google sees your website. Under the Crawl Errors Google Search Console provides a list of all connection errors that occured while Google attempted to index your site.

The Pros:

Google regularly spiders your site and attempts to index any URLs that it finds, as well as any URLs it already had in it’s database. If any URL stops working, whether it’s new or historical, Google Search Console will let you know.  These reports can be exported to CSV, so you can do something useful with them, like create a redirect list. This is also helpful because essentially Google Search Console is discovering broken links before actual humans are, so check regularly and act on it.

The Cons:

If you have any pages that you’ve intentionally prevented search engines from indexing either through robots.txt or through a noindex tag, Google will not index them and, therefore, not check to see if the links still work. Google Search Console only displays 404 errors generated by Google’s crawler and not actual users.

Using Google Analytics to Find 404 Errors

Using Google Analytics to Find 404 Errors

5. Find Errors Using SEO Redirection (or another 404 Management Plugin)

This tip is WordPress specific, but most content management systems have a similar feature or plugin.

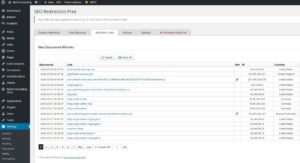
There are lots of plugins that can help you discover and fix 404 errors. I use SEO Redirection as well as it’s premium sibling, SEO Redirection Premium. These plugins track 404 errors that occur on your website and help you easily resolve them by redirecting the broken URL to an existing page. Yoast SEO’s premium version also has this feature built in. Yoast SEO Premium will hook up straight to your Google Search Console account, and allow you to redirect 404 errors discovered by Google from within the plugin.

The Pros:

WordPress can become your one-stop shop for discovering and dealing with 404 errors and broken links. And if you’re willing to pay for a premium plugin, you can really automate the process.

The Cons:

WordPress specific, and all of the problems that come with installing plugins. To make the most of this method you should  purchase the premium version of one of these plugins. But trust me: they’re worth it.

404 Errors Caught by SEO Redirection Premium

404 Errors Caught by SEO Redirection Premium

6. Find 404 Errors with Other Services

There are a host of other services that can help you discover 404 errors including OnPage.org and Moz. I only bring these up for the sake of thoroughness. There’s absolutely no reason you need to sign up for a paid service just to discover broken URLs and 404 errors, but these services do a lot more than that and are worth investigating.

The Pros:

Another set of eyes scanning your website for errors can’t be a bad thing. Plus these services offer far more than just 404 error reports.

The Cons:

Services like Moz don’t come cheap. So don’t use them unless you’re looking for more than just a 404 error detector.

Moz 4xx Error Report

Moz 4xx Error Report

Summary

So what do I do?  I use a combination of all of the methods above. A link scanner or spider like Xenu helps you proactively discover and fix broken links within your website, but can’t help you with links from other sources like other websites or Google. Google Analytics helps you discover URLs that are actually breaking as people attempt to view them. Google Search Console helps you discover broken links that Google either has in their index, or is trying to index. WordPress plugins like SEO Redirection and Yoast SEO Premium help me easily deal with 404 errors as I discover them. And of course, I already use Moz for other reasons, so I take it’s 404 report into consideration as well.

In another post, I’ll be talking about how to handle 404 errors on your WordPress website once you find them. Stay tuned!

The Most Exciting Feature of WordPress 4.5 Beta 1

The news just broke that WordPress 4.5 Beta 1 was just released. It seems to me that this released doesn’t provide too many sexy new features. There are a number of new Customizer integrations, such as Theme Logo Support and a Responsive Preview feature. But the new feature that excites me is the addition of the wp_add_inline_script() method, which complements the already existing wp_add_inline_style() function. The new function provides a standard way to include inline JavaScript.

Why does this matter? Adding inline styles through this method can guarantee that dependencies have been loaded before the code executes. That alone is important. But I’m excited by the potential this function brings to the table. As themes and plugins adopt it, caching solutions should be able to lock into it and move the inline scripts to external files that can be cached and even offloaded to a CDN rather than re-downloaded for every page view. I’m sure we’ll see solutions like Super Cache and Fastest Cache integrating quickly.

How to Post to Instagram from a PC

Instagram is a great social network for your everyday user. But it’s clearly designed around a mobile experience. If you go to the Instagram website on a PC and log in, you’ll notice it’s essentially a read-only experience. You can’t upload, which is really annoying for those of us who want to polish our images in Photoshop or Lightroom before we share them. So today I’m going to show you how to post to Instagram from a PC.

How to Post to Instagram from a PC Using Gramblr

To post to Instagram from a PC we can use a free tool called Gramblr. Go to gramblr.com, and click the button for your platform. Gramblr downloads as a ZIP file, so go ahead and right-click and choose Extract All to extract the ZIP file.

Now you can open Gramblr. Enter the folder that was extracted by the ZIP file, and double-click gramblr.exe.

Windows Security Warnings

If Windows warns you about running the program, go ahead and allow it. As of the recording of this video, Grambler is a pretty safe download.

Create a Gramblr Account

When you first open Grambler, you’ll need to create a Grambler account. Go ahead and enter your email address and a secure password. You’ll also need to enter your Instagram username and password. Once you’ve done that go ahead and click Sign Up.  I already have a Grambler account, so I’ll click Log in now, and then enter my username and password.

Upload Your Image

Grambler has a ton of features, but for this video all we really care about is the upload feature. If you’re not already on it, click the Upload Now! tab. You can either drag a file onto the upload area, or click the Upload area and then select your file. Go ahead and move your image or video to the upload area.

Crop Your Image

Grambler gives you an opportunity to crop your image before you upload it. Click Save if you’re happy with your image as-is, or click and drag on the image to add crop marks. You can limit cropping to a particular scale by choosing the 4:3 or 1:1 scale buttons. When you’re satisfied, click Save.

Apply Filters

Just like Instagram on  your phone, Gramblr gives you the chance to apply filters to your images before you upload. Go ahead and explore the filters and motions buttons, and click Continue when you’re happy with your image.

Post or Schedule

Finally, Gramblr lets you write a caption and apply hashtags. At this point I like to go to the Instagram homepage and do searches to explore hashtags that might be popular for my image. Once I’ve added the caption and hashtags, I can choose to upload immediately, or schedule the post for another time. This is a really useful feature for folks that want who have a ton of photos to upload, but don’t want to bombard their audience all at once. Go ahead and click Send.  When  you do your image will either get posted immediately to Instagram, or wait to be posted at the scheduled time.

Be a Web Developer Not a Plugin Installer Masthead

Be a Web Developer. Not a Plugin Installer

WordPress is my CMS of choice based on it’s simplicity, extensibility and the variety of plugins and extensions. Given it’ popularity, I’m not the only one.

But I’ve been stepping out on my lady. I’m working on a project in which the client chose the platform before I joined the team because it provided key features and it’s stock theme roughly matched their mock-ups. The choice to use third-party code led to missed deadlines, scope creep, and scrapping features because the platform isn’t easily extended. (For the record, WordPress would have been a terrible choice too.)

We’ll never know if it was the right decision, because the project will launch duct-taped together. This project wasn’t built on WordPress. So why am I talking about it? If we abstract away the technology there is an important lesson to be learned about what it means to be a web developer.

Hold Yourself Accountable

Developers are responsible for the code they sell to clients, not just the code they write. Our clients trust us to make good decisions on their behalf, and we often take that trust for granted.

We shouldn’t expect a client to understand the difference between our code and third-party code. If we choose to use plugins to build a solution we take credit when that choice results in success. Yet when the extensions we install (plugins and themes) lead to failures like hacks or broken updates, we’re perfectly willing to absolve ourselves of responsibility. It’s not our fault! It’s the plugin!

Who made the decision to install that plugin? Are you a web developer? Or are you just a Plugin Installer?

Be a Web Developer. Not a Plugin Installer

Choosing to install a theme or a plugin should not be a careless act. Perhaps we’ve stopped thinking about it because WordPress has made installing them so easy. Many developers approach plugins with a cavalier attitude and don’t consider the consequences of blindly installing third-party code that could do just about anything intentionally, accidentally, or through a hacker’s exploitation.

Plugins: WordPress’ Double-Edged Sword

Plug-ins made WordPress successful. So how can we leverage the massive library of free and paid extensions while minimizing our exposure to the problems they can produce? Here are a few questions to ask yourself to avoid installing bad plugins.

1. Did you pirate the plugin?

If you pirate a WordPress plugin, shame on you. People who make things for a living shouldn’t be comfortable stealing other people’s creative works. It’s really that simple. Besides: installing plugins from pirated sources is a recipe for disaster.  Pirated plugins often come with exploit code baked right into them. Their backdoor isn’t technical: it’s exploiting your cheapskate nature. Just. Don’t.

2. Does the plugin come from a trustworthy source?

There are a ton of sources for WordPress plugins on the Internet. The official WordPress Directory for example. It should go without saying that you shouldn’t install plugins and themes from disreputable sources. Don’t shy away from premium plugins from foundries like WooThemes and developers that sell their work via CodeCanyon, but research them before you install them.

  • Consider plugin and theme ratings.
  • Read user reviews
  • Check the plugin’s update history to make sure the developer is dedicated to maintaining it
  • Look for third-party information on whether or not the plugin has been hacked in the past

3. Do You Really Need a Plugin?

We’re web developers, right?

So why do we feel like we need to introduce other people’s  code into our sites just to add social sharing buttons, insert a tracking code, or add an image slider? If you can’t do these things for yourself, you’re not a developer. You’re a plugin installer.

Plugins make some tasks so easy we take them for granted.   But it’s important to remember that every time you install a plugin you introduce another potential vector of attack and another thing  that needs maintained forever.

Sliders are a great example.  Everybody wants a slider (though their value is dubious). Most of us simply install one of the many popular slider plugins and get on with our day. But slider plugins have been particularly vulnerable to attack. The incredibly popular Slider Revolution plug-in has been a very popular hacking target in the past.

So ask your self: do you need that slider?  Does the client really need to maintain it from the WordPress Dashboard? If not, it’s a prime candidate for skipping a plugin, and writing a few lines of JavaScript that won’t get your site hacked.

Summary

These lessons aren’t specific to plug-ins. They’re not specific to WordPress. Heck, I’m not even sure they’re specific to web development. As professional problem solvers we need remain conscious of the individual parts we use to build our solutions. Don’t Repeat Yourself, and Don’t Reinvent the Wheel. These philosophies remain true.  But don’t be afraid to build better mousetraps, particularly when the current design has a history of failure.

How to Create a WordPress Theme Thumbnail Image

How to Create a WordPress Theme Thumbnail Image

When you’re building a new WordPress theme, it’s always helpful to create a custom theme thumbnail image (or theme screenshot, if you prefer).  A theme’s thumbnail image is used to display a tiny screenshot of the theme in the WordPress Dashboard so a user can see what the theme looks like before they activate it.

How to Create a WordPress Theme Thumbnail Image

Creating the thumbnail is easy: create a PNG image that’s 880 pixels wide x 660 pixels tall that shows a screenshot of your theme in action. Save that image as screenshot.png in your theme’s directory, and it will show up in the WordPress Dashboard.

I’ve taken the guesswork out of the process by providing a template you can start from. Just open the PSD or PNG image provided and paste in  your screen shot.  Resize and position the screenshot within the template, and save as screenshot.png.

[button link=”https://www.reich-consulting.net/wp-content/uploads/2015/11/wordpress_theme_thumbnail_template.zip” color=”blue” align=”center” target=”_self” size=”large”]Download WordPress Theme Thumbnail Template[/button]