PHP stands for PHP HyperText Processor. It’s what’s known as a recursive acronym. PHP is an open source programming language primarily used for web development.

Posts

Alphabetical Post Navigation in WordPress

Have you ever had a need to build a page with alphabetical navigation in WordPress? There are lots of scenarios where this makes sense:

  • Alphabetical sitemaps.
  • A Glossary or Table of Contents


I’m building a site right now focused on terms and their definitions. Presenting terms in a default archive loop makes no sense. A better experience is to present them as a glossary of terms with alphabetical navigation.

There are plugins that can get you where you need to go, but they’re not necessary. A little bit of custom template code leveraging PHP output buffering gets you where you want to go pretty efficiently.

Create a new Template

I’m building a glossary page that will list all of the posts in a custom post type, called term. By using the WordPress Template Hierarchy I know that WordPress will create that page using a template namedarchive-terms.php if I create one in my theme. This is a logical place to put my custom query and template code. Place yours wherever it makes sense.

Query the Content You Want to Display in the Alphabetical List

By default, any template code you write operates against WordPress’ default loop. If that’s what you want in your list, you don’t need to create a new query. I want my Glossary page to list all of the terms in the glossary alphabetically. I need to create a custom query that selects and loops the right content.

Build and Buffer the Content

That query gives me the content I want in my glossary page. Now I need to loop over the query and do something with it’s results:

  1. Build the alphabetical navigation elements.
  2. Build the alphabetically-sorted list of posts that can be navigated to using alphabetical navigation.

We have two choices. We can loop the content multiple times and build the two distinct elements. The second choice is to loop once and use output buffering to control what renders when. We’ll do multiple loops first, then combine and simplify in the final example.

Building the Alphabetical Navigational Elements

First, lets loop through the results and capture the first letter of all the posts to build our navigation:

The template code above is a cookie-cutter WordPress loop that iterates through the posts, captures the first letter of each post, and renders a navigation list of each letter that links to the anchor#begins-with-<letter>. If you’ve got a basic understanding of WordPress Loops and basic theme coding, it’s not too complex. Because our query already specified ascending alphabetical order, we don’t have to worry about sorting the list ourselves.

Now it needs something to link to.

Building the Alphabetical List of Posts

Next, we need to build out our list of content. In this example we’ll keep it simple: we’ll build a two-tier list with anchors.

In the code above we built a list of letters linked to the alphabetical navigation menu. Each list element contains a child unordered list of all posts that start with that letter. We create some flags that track the current letter and whether or not we’re in the middle of a list. We use these to properly open and close our ordered list and list item tags.

Putting it All Together

The two blocks above can be simplified by leveraging PHP’s output buffering functions. Output buffering essentially stores your output in memory so you can retrieve and display it at a later time. Using output buffering we avoid duplicate queries and loops. And we completely avoid tracking flags used to control tag nesting.

The first thing we do is create $alphabet, which is an associative array that will have letters as keys and arrays of output sections as values. As we loop our content we create an output buffer using ob_start(), output each post as a list item linked to it’s permalink, and capture that output using ob_get_contents(), save the output into the current letter, and close the buffer with ob_end_clean().

Finally, we use the keys of the associative array to build our alphabetical navigation. Then we use the array one more time to build anchored sections of content.
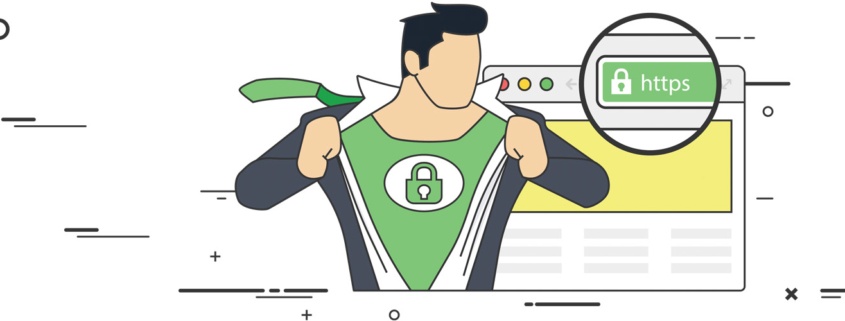
Your WordPress Hosting Is Upgrading to PHP 7.2

Are you a Reich Web Consulting WordPress Hosting customer?

We don’t want to bore you with technical details, but we want you to know that some changes are coming to your web hosting platform that may affect your website.

Your site runs on WordPress. WordPress is written in a language called PHP, which has gone through many versions. Your site currently runs on PHP 5.6.  This version will reach its end of life on January 1, 2019.  This means that it is no longer supported software, and will become a security problem if not upgraded.

Don’t worry! You chose to host with Reich Web Consulting because we’ve got your back. We still do. If you trust Reich Web Consulting to do right by you, well, there’s no need to keep reading. Go enjoy this beautiful summer day! If you’d like to learn more, continue on.

The Benefits

There’s a reason we’re not asking if you want this upgrade, and that reason is SECURITY. Not performing the upgrade would eventually leave your website open to attack.  Every web host that supports WordPress and PHP must make this transition within the next 5 months, or willfully choose to leave their customers vulnerable to hackers.

As an added benefit, PHP 7.2 is significantly faster than PHP 5. Some benchmarks indicate that PHP 7.2 can run a WordPress page request over 2x faster than PHP 5! Faster page loads mean more users will stay on your site longer, and may even help search engine ranking.

Our Upgrade Plan

We’re upgrading to the latest version of PHP, which is 7.2. Most sites will work without any modifications, but some may require additional work.

In order to upgrade our sites without causing service interruptions, we’ll go through the following process.

  1. Run a Compatibility Tool Against Your Site to Determine if the PHP 7.2 upgrade is safe.
  2. If it’s not we’ll determine what components are incompatible.
  3. If those components are free and won’t affect your site performance to upgrade them, we’ll go ahead and update those components.
  4. If making your site compatible with PHP 7.2 will include any costs, we’ll contact you before we do anything. This could be due to premium plugin upgrades, or significant labor involved in more complex scenarios.

Only after all the sites we host are tested and confirmed to work with PHP 7.2 will be “flip the switch.

Our Upgrade Timeline

We plan to begin testing immediately.  We plan to complete the process and finalize the upgrade to PHP 7.2 at the end of August.

Install the PHP SQLSRV Driver on Linux

Rejoice! Microsoft actually does provide a PHP Linux driver for Microsoft SQL Server. The bad news is, it can be a real pain to get it working.  I went through this experience tonight while setting up a utility I wrote for a client. I ran into two separate issues. This article provides some assistance with the issues I ran into when I tried to Install the PHP SQLSRV driver on Linux.

How to Install PHP SQLSRV Driver on Linux

The instructions in the repository’s readme.md are actually pretty good. Check out the official Github repository for the driver for the latest version and installation information. I recommend you follow their instructions first. When you hit a roadblock, come back to this article for help.

PECL Building with Wrong PHP Version

The final step in the installation is installing the base driver and the PDO variant withpecl install. PECL runs a build process on your machine and it uses a tool called phpize to execute the build. The version of this tool needs to match your PHP version. Otherwise, the build will succeed, but the extension file it generates won’t be compatible with the version of PHP you’re running. You’ll know pretty quickly if this is the case if you get “can’t load extension” errors after you build and execute PHP.

To solve the problem, install the version of phpize that matches your PHP version. For example, if you are running PHP 7.1, you would run:

sudo apt-get install phpize7.1

Microsoft ODBC Client is Missing

After I fixed the problem above, I ran my PHP script and the database connection failed. The PDO SQL Server driver reported an error message that it could not execute because it required the Microsoft ODBC Client. Installing the client is actually part of the steps in the instructions provided on Github. But for me, the installation failed and I didn’t notice. I went back and repeated this step and found that there was a missing dependency that would not install. Once I manually installed it and re-ran the client installation steps, then the PDO driver started working.

The Github repository below contains the official drivers from Microsoft. Check out the repository for the latest version information and installation instructions.

WordPress Limits The Number of Items on a Menu

I just ran into a problem on a client site: I went to add two new items to their primary navigation. The first was was successful.  And even though clicking save said it was successful, when the Menu tool refreshed and I refreshed the live page, the second item was missing.

WordPress doesn’t actually set a limit on the number of menu items you can have. It seems like it does though, since an never never actually occurs when it stops adding them.

Some Googling turned up this issue in the WordPress Bug Tracker. Apparently when you click Save WordPress returns every menu item as a separate request variable.  When you get to 89 menu items, the number of variables being sent passes the default limit set by PHP, and menu items 90 and beyond get ignored. While the fix suggested by the bugtracker didn’t help me, the solution was easy. I just added the following line to my site’s .htaccess:

php_value max_input_vars 2000

Adding that PHP configuration variable will override the default max_input_vars limit, which causes WordPress not to receive and therefore save menu items beyond 89.

Creating a WordPress Plugin, Part 1: Naming Your Plug-in

[amazon_enhanced asin=”0470916222″ /]

The first and arguably most important step in creating a WordPress Plugin is choosing a name for it. If you plan to share your plug-in with others it should obviously be catchy, but more importantly it should also be unique for two very good reasons explained below.

Make Your Plugin Stand Out

WordPress has a vast number of free and commercial plugins available. If you choose to share your plug-in with others you’ll want your plug-in to stand out from the rest. Before you decide on a name for your plug-in, use Google and the WordPress Plugin Directory to do some research. Rather than call our recipe plug-in that we’ll be creating simply Recipes, we’re going to call it Delicious Recipes, by Reich Web Consulting.

Namespacing

Regardless of whether or not you choose to share your plugin with others, when you begin coding you’ll have to make decisions about naming things like functions, classes, constants, and other identifiers.  Identifiers must be unique not just within your plugin but to PHP, WordPress, your active theme, and any other active plug-ins.  Defining two identifiers with the same name will result in a namespace collision: an error condition in which two or more identifiers have the same name.  Lets say we’ve written the following PHP code:

// Intentially cause a namespace collision: 
function printf( $args ) { 
    // Function definition
}

Because the printf() function already exists in PHP, the following error is generated:

An example of a PHP namespace collision error.

Using the PHP and WordPress documentation you can safely avoid namespace collisions with PHP and WordPress, but how do you avoid colliding with the thousands of other plugins and themes that you and others might install alongside of your own? The answer is to namespace your plugin code. 

How do you namespace your plug-ins?  It’s as simple as choosing a prefix that’s presumably unique to your plug-in and appending it to all global identifiers. The name of my company is Reich Web Consulting and the plug-in we will be developing is for managing recipes, so I’m going to choose RC_Recipes as my namespace:

<!--?php /*  * Define a namespaced class.  */ class RC_Recipe_Plugin {      // Class code } /*   * Define a namespaced function.    */ function rc_recipe_plugin_function( $args ) {      // function code  } /*   * Define a namespaced constant.   */ define( 'RC_RECIPE_CONST', 0 ); ?-->

If you’re experienced with PHP you might be wondering why we don’t solve the problem of namespacing by using PHP’s built-in namespace feature. The reason it’s not used is because, at of the time this tutorial was written, WordPress requires version 5.2.4 of PHP, which does not support namespaces. While you could still write your plug-in using PHP namespaces you would be seriously limiting the number of people that could use it by requiring a version of PHP newer than that which WordPress itself requires.

Summary

Before you go all gung-ho slinging code it pays to takes a few minutes to consider the design and marketing implications of naming your plugin.  Choose something unique but catchy, and use your plug-in name to create a unique namespace for your code.   In the next part of this tutorial we’ll be creating the directory and file structure for out plugin.  Catch you then!