WordPress is a free open source content management system. Reich Web Consulting provides customized WordPress solutions including WordPress-based websites, theme creation and customization, and plug-in development.
I’m doing some work for a celebrity chef who has a ton of cooks in her kitchen. One of them is responsible for her blogging and social media strategy. She wants to queue a bunch of content that will be released on a slow, steady drip. The WordPress Scheduled Posts features is normally the perfect tool for this job. Scheduled Posts didn’t work on her first attempt. Unfortunately the post she scheduled for New Years day remained in draft mode the morning of January 1. What went wrong?
How to fix WordPress Scheduled Posts by Setting your Time Zone
The answer is simple. The developer that initially setup the client’s WordPress site left the time zone configured to UTC while the the client and her entire support team are on Eastern Time. Solving the problem was as easy as setting the time zone in the WordPress General Settings screen by going to your Dashboard and selecting Settings > General from the main menu. Choose your time zone and then click Save Changes. WordPress lists time zones by UTC offset. If you’re not sure of your offset, you can consult a helpful time zone chart here.
Follow the steps shown in thie image to set your time zone in WordPress.
https://www.reich-consulting.net/wp-content/uploads/2017/01/WordPress-Logo-Featured-Image.png6281200Brian Reich/wp-content/uploads/2019/09/reich-web-consulting-logo-o.svgBrian Reich2017-01-02 09:07:512017-01-02 09:07:51WordPress Scheduled Posts and Time Zones
The first and arguably most important step in creating a WordPress Plugin is choosing a name for it. If you plan to share your plug-in with others it should obviously be catchy, but more importantly it should also be unique for two very good reasons explained below.
Make Your Plugin Stand Out
WordPress has a vast number of free and commercial plugins available. If you choose to share your plug-in with others you’ll want your plug-in to stand out from the rest. Before you decide on a name for your plug-in, use Google and the WordPress Plugin Directory to do some research. Rather than call our recipe plug-in that we’ll be creating simply Recipes, we’re going to call it Delicious Recipes, by Reich Web Consulting.
Namespacing
Regardless of whether or not you choose to share your plugin with others, when you begin coding you’ll have to make decisions about naming things like functions, classes, constants, and other identifiers. Identifiers must be unique not just within your plugin but to PHP, WordPress, your active theme, and any other active plug-ins. Defining two identifiers with the same name will result in a namespace collision: an error condition in which two or more identifiers have the same name. Lets say we’ve written the following PHP code:
// Intentially cause a namespace collision: functionprintf($args){// Function definition}
// Intentially cause a namespace collision:
function printf( $args ) {
    // Function definition
}
Because the printf() function already exists in PHP, the following error is generated:
Using the PHP and WordPress documentation you can safely avoid namespace collisions with PHP and WordPress, but how do you avoid colliding with the thousands of other plugins and themes that you and others might install alongside of your own? The answer is to namespace your plugin code.
How do you namespace your plug-ins? It’s as simple as choosing a prefix that’s presumably unique to your plug-in and appending it to all global identifiers. The name of my company is Reich Web Consulting and the plug-in we will be developing is for managing recipes, so I’m going to choose RC_Recipes as my namespace:
<!--?php /* * Define a namespaced class. */class RC_Recipe_Plugin {// Class code } /* * Define a namespaced function. */ function rc_recipe_plugin_function( $args ) { // function code } /* * Define a namespaced constant. */ define( 'RC_RECIPE_CONST', 0 ); ?-->
<!--?php /* * Define a namespaced class. */ class RC_Recipe_Plugin { // Class code } /* * Define a namespaced function. */ function rc_recipe_plugin_function( $args ) { // function code } /* * Define a namespaced constant. */ define( 'RC_RECIPE_CONST', 0 ); ?-->
If you’re experienced with PHP you might be wondering why we don’t solve the problem of namespacing by using PHP’s built-in namespace feature. The reason it’s not used is because, at of the time this tutorial was written, WordPress requires version 5.2.4 of PHP, which does not support namespaces. While you could still write your plug-in using PHP namespaces you would be seriously limiting the number of people that could use it by requiring a version of PHP newer than that which WordPress itself requires.
Summary
Before you go all gung-ho slinging code it pays to takes a few minutes to consider the design and marketing implications of naming your plugin. Choose something unique but catchy, and use your plug-in name to create a unique namespace for your code. In the next part of this tutorial we’ll be creating the directory and file structure for out plugin. Catch you then!
https://www.reich-consulting.net/wp-content/uploads/2012/11/wordpress-logo-stacked-rgb.png310499Brian Reich/wp-content/uploads/2019/09/reich-web-consulting-logo-o.svgBrian Reich2012-11-06 14:36:552012-11-06 14:36:55Creating a WordPress Plugin, Part 1: Naming Your Plug-in
In my last article I talked about WordPress Posts, one of the two primary content types in WordPress. In this article I’d like to talk about WordPress pages.
What’s a WordPress Page?
WordPress Pages are your blog’s primary content. That’s not to say that they’re more important than your blog posts, but rather that they support your posts and are available wherever a user might find themselves on your site. To quote WordPress.com,
Pages live outside of the normal blog chronology, and are often used to present timeless information about yourself or your site — information that is always applicable.
Another way of looking at WordPress pages is that they are the items that appear on your primary navigation.
If you want to use WordPress to build a static website (just a few pages that rarely change, as opposed to a blog with dynamic, changing content) you can do this with WordPress pages. Simply create your pages and configure WordPress to use one of them as the front page.
What Content Should I Put in my WordPress Pages?
Pages can contain just about anything you care to put on them, but there are some classic examples.
A page might offer background on you or your company (“About Me”). It might display an email form and phone and mailing address information (“Contact Us”). It could display an outline of your site that helps your visitors find the content they’re interested in on your site (“Site map”). If you’re WordPress site provides e-commerce you’ll probably have a “Shop” page, or if you’re site focuses on a retail product you might have a “Store Locator.”
Creating and Editing WordPress Pages
If you want to create a new page, log into your WordPress Dashboard and click Add New under the Pages heading on the Dashboard menu. If you want to edit an existing page just find the page by clicking on the All Pages link under the Pages heading.
The Page editor looks like the Post editor with a few exceptions. Let’s talk about each item in some detail below.
The Page Title
The page title is the name of the page. It will appear as the link text in your navigation, the title that appears at the top of the user’s web browser, and the heading that appears above the page content in most WordPress themes. Give some thought to your page title, as you probably won’t want to change it often. If you’re editing a page that appears on most websites such as About Us or Contact Us, don’t get too cute. Visitors get accustomed to finding information under certain headings, and using different language may make finding it confusing.
If you’re concerned about search engine optimization, use a plug-in like WordPress SEO by Yoast to help you choose keywords and include them in your title.
The Page URL
The page URL appears just below the page title. The bulk of the URL is automatically generated using your site’s permalink structure, but you can edit the part of the URL specific to the page, called the page slug. By default your page’s slug is automatically generated when you create the title.
The Page Content
This is where you will actually design your page and add text, images, videos, and just about anything else to its body. The editor functions in Visual and HTML mode. Visual Mode provides the following features:
Upload and insert images and other media.
Font styles such as bold, italic, and strike-through.
Lists (orders as well as unordered).
Text alignment (left, right, centered)
Creating hyperlinks both within and outside of your WordPress site.
Spell-check
Page breaks
HTML hierarchies and formats including headers (h1 through h6 tags), block quotes, and addresses. Utilize these features as much as possible to break your article into logical components.
HTML mode is for folks who know HTML and want more control over their content. Just remember that you can switch modes at any time, but if you author a page in HTML mode and switch to graphical mode to make some edits, be ready for the editor to break your carefully crafted HTML markup!
Publish Options
The Publish box, or meta-box in WordPress terms, lets you control who, if anyone, can view the page. Clicking the Publish button saves your page and any settings that you’ve changed. If your page is already published, the Publish button will say Update instead. Before you publish your page you will also have the Save Draft option which allows you to save your post without making it publicly available on your site. For example I’ve saved this page as a draft 5 times already because I needed to stop writing and return to finish it later.
The Status option provides three options:
Draft – Your page is in the editing process and won’t be displayed on your public site.
Pending Review – Similar to draft mode. A post pending review requires an administrator to check and publish it.
Published – Your page is complete and is visible on your public site.
Scheduled – Similar to Published, but your post is not visible until a specific date.
The Page Visibility option provides several options as well:
Public – Public visibility (the default) means that anyone browsing your WordPress site can view the page.
Password Protected – WordPress prompts visitors for a password to view the page.
Private – Only authenticated users (like admin or other users you have creates within WordPress) will be able to view the page.
The Publish option allows you to choose to publish the page immediately or at a specific date and time. This is useful if you would like to author a page ahead of time that isn’t visible until a specific date, such as a page about a fundraiser that begins on a specific date.
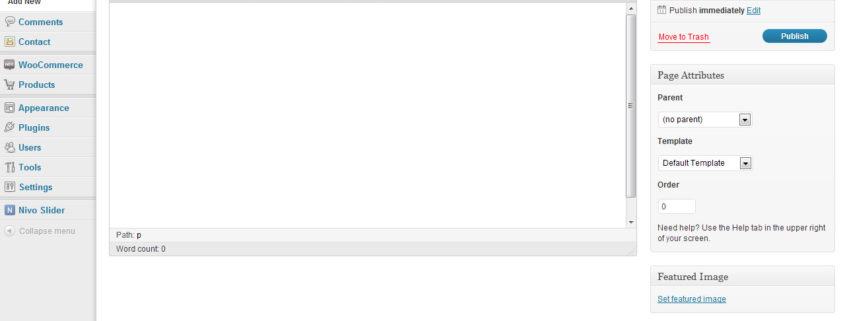
Page Attributes
By default the Page Attributes meta-box allows you to set the parent page, template, and order for the page that you’re editing.
The Parent Page option allows you to organize your pages into a hierarchy. If you begin to accumulate a lot of pages, you’ll soon notice that they break your top-level navigation, or at the very least make it look ugly! At this point you’ll want to consider grouping your pages into a hierarchy, in which similar pages are grouped together.
For the sake of argument let’s say your site has the following pages: About Us, Contact Us, Our Staff, Shop, Directions, and Sitemap. Making About Us the parent page for Contact Us, Our Staff, and Directions makes sense because these pages provide additional information about you or your company. Sitemap and Shop do not. In addition, they’re important enough that you would want them to be top-level navigation items anyway.
The Template option allows you to change the layout for a particular page, however the template options available are completely dependant on your theme. Many themes provide one, two, and three-column templates or templates designed for a specific function such as highlighting an image or a video.
The Order option allows you to customize where in your navigation menus this page will appear. A value of 0 is the default. A lower value will place a page closer to the beginning of your menu, whereas a higher value will place the page closer to the end. A tie between pages with the same order is broken by the alphabetical order of their titles.
Featureds Image
The Featured Image option is theme-specific. That is, support for this option must be built into the active WordPress theme in order for this option to be visible on the Page editor. This option allows you to upload an image to WordPress and assign it to the post. How it displays on your site is completely up to the theme.
https://www.reich-consulting.net/wp-content/uploads/2012/07/Page-Editor.jpg9231280Brian Reich/wp-content/uploads/2019/09/reich-web-consulting-logo-o.svgBrian Reich2012-07-15 10:36:582017-12-29 13:41:51WordPress Pages and the WordPress Page Editor
In my last post I talked about installing WordPress themes. Themes help you quickly change the look and feel of your website. But what if your site needs a feature that isn’t built into WordPress? Well today we’re going to learn how to add features to our blogs by installing WordPress plugins.
What the Heck is a Plugin?
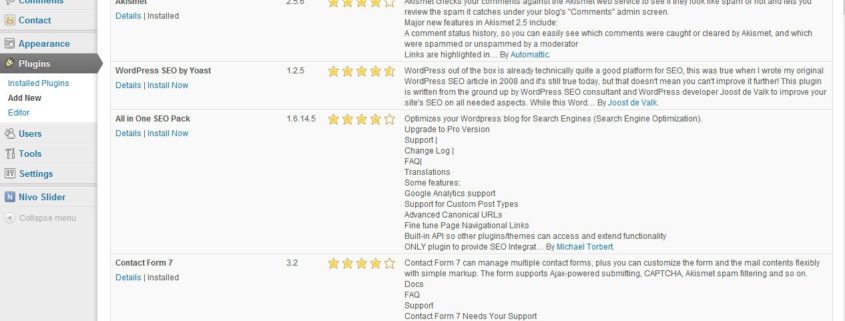
Some of the most popular WordPress plugins help you improve your SEO and add interactivity to your blog.
Like themes, plug-ins come in two flavors: free and premium. Most free plug-ins are available on the official WordPress Plug-in Directory. Like themes, you shouldn’t use free plug-ins that come from other sources. Plugins in the Directory have been vetted by the WordPress community and are usually updated frequently.
Finding a Plug-in
There are thousands of free plug-ins available in the WordPress Plug-in Directory. You can search the directory through the website or through the WordPress Dashboard:
Log into your WordPress Dashboard
Under the Plug-ins menu click Add New.
On the Install Plugins page you can search for plug-ins by keyword, or you can use the Featured, Popular, and Newest.
Don’t forget: there are also premium (paid) plug-ins available from a variety of companies such as Woothemes. When I first started using WordPress I had an aversion to paid plug-ins. Why should I pay to add one simple feature to a system that’s already free?
That mentality changed when I started using WordPress professionally. Sometimes installing WordPress plugins from the WordPress Plugin Directory won’t provide exactly what you’re looking for. (I’m looking at you, Every Free Slider Plug-in Out There). Sometimes times it’s faster to pay for a feature rather than to build it yourself or work with a half-baked plugin. In these situations don’t be afraid to go premium. I use numerous premium plug-ins including Nivo Slider and payment gateway extensions to Woocommerce.
Installing WordPress Plugins
There are two methods for installing WordPress plugins. The first is to search for the plugin through the Install Plugins screen and clicking install. The second is by uploading the plugin and then activating it.
Installing WordPress Plugins through the Install Plugins Screen
Installing WordPress plugins through the Install Plugins screen is the simplest way to install plugins from the WordPress Plugin Directory. Search for the plugin through the Install Plugins screen then click install.
Log into your WordPress Dashboard.
On the Dashboard menu click Add New under the Plugins menu.
Search for a plugin. You can do this by typing in a plugin name or a keyword into the search field and clicking Search Plugins, or by exploring the Featured, Popular, and Newest links, or by clicking any of the tags in the Popular Tags area.
Once you have located the plugin you would like to install click Install Now. Depending on the configuration of your website, you may be prompted for your FTP username and password. Enter them if prompted.
After the plugin is finished installing, you can make it active by clicking Activate Plugin.
Installing WordPress Plugins by Uploading through the Install Plugins Screen
Installing WordPress Plugins by uploading through the Install Plugins screen is the simplest way to install plugins from outside the WordPress Plug-in Directory. These steps assume that you’ve already downloaded the ZIP file containing the plugin.
Log into your WordPress Dashboard.
On the Dashboard menu click Add New under the Plugins menu.
Click the Upload link.
Click Choose file and select the ZIP file containing the plugin. Click Install Now. Depending on the configuration of your website, you may be prompted for your FTP username and password. Enter them if prompted.
After the plugin is finished installing, you can make it active by clicking Activate Plugin.
Uploading Plug-ins via FTP
FTP to your WordPress site and navigate to wp-content/plugins/.
Extract the ZIP file containing your plugin. It should contain a single directory named after the plugin.
Upload that directory to wp-content/plugins/.
Log into your WordPress Dashboard.
Click Plugins on the Dashboard menu.
Locate the plugin you just uploaded and click Activate.
Post Install Configuration
After installing WordPress plugins many will require some sort of configuration after you activate them. For example the Akizmet spam filter plugin requires that you enter an API key (a code that identifies your account with them). Most plugins will provide a notification at the top of your dashboard that they require configuration.
Summary
Plugins do for your blog’s function what themes do for it’s form. They can make your blog more than just a blog, and few WordPress sites ever reach their full potential without at least a couple of key plugins. Remember: only install plugins from the WordPress Plugin Directory and from reputable developers of premium plugins. Once you locate a plugin you’d like to use on your blog you can install it directly through the Dashboard or by uploading it via FTP, but you’ll still have to activate the plugin in the Dashboard once you finish.
Thanks for reading! In my next couple of posts we’ll cover how to add content to your blog in the form of posts, pages, media, and links.
There are two ways to customize a WordPress site: plugins and themes. Generally speaking, plugins are used to add functionality (maps, image galleries, etc.) and themes are used to change a site’s public appearance. This article is about how to choose and install a WordPress theme.
Selecting a Theme
There are thousands of themes available for WordPress and they come in two flavors: free and premium. Free themes are just that: you can use them free of charge. Only use free themes from the official WordPress Free Themes Directory. If you download a free theme from another source (or worse yet, use a pirated copy of a premium theme), there’s a pretty good chance that it will contain malware that will infect your website. You can search the Free Themes Directory without ever leaving your WordPress Dashboard by clicking the Appearance Dashboard link, then clicking the Install Themes tab.
Premium themes are available from numerous companies. I’ve personally used themes from Woothemes and ThemeForest and find them both to have high-quality themes and great support. As somebody who works closely with code however, I’m partial to Woothemes.
Once you’ve picked out your WordPress theme it’s time to install it. Themes are installed one of two ways: through the WordPress Dashboard or via FTP. Free themes from the Free Themes Directory are easily installed through the WordPress Dashboard. Premium themes and themes from other repositories (you’re not using other repositories, are you?) can be uploaded either through the WordPress Dashboard or via FTP.
Installing a Free Theme via the WordPress Dashboard
Begin by logging into your site’s dashboard.
Click the Appearance link on the dashboard menu and it will bring up the Manage Themes screen. This screen displays all of the themes that you currently have installed and gives you a convenient way to switch between them.
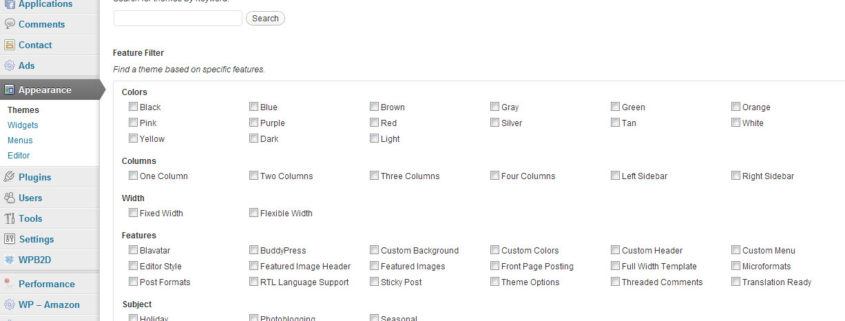
At the top of the screen click the Install Themes tab. This screen provides the ability to search the Free Theme Directory, select a theme, and install it without ever leaving your WordPress Dashboard.
You can find a theme using the search and filter features, or browse Featured, Newest, and Recently Updated themes.
Once you’ve located the theme you’d like to install, click it’s Install link.
Click Activate to tell WordPress to use this theme to style your site.
Uploading Themes
If the theme you want to install isn’t in the Free Theme Directory, download the ZIP file for your theme to your computer and upload it to WordPress using one of the following two methods:
Uploading a Theme Through the Dashboard
Log into your site’s WordPress Dashboard.
Click the Appearances link on the Dashboard menu.
Click the Install Themes tab.
Click the Upload link.
Click Choose File and select the ZIP file containing your theme.
Click Install Now to upload and install your theme.
Click Activate to tell WordPress to use the theme to style your site.
Uploading a Theme Via FTP
Extract the files from your theme’s ZIP file. The ZIP should contain a single folder named after your theme.
Connect to your site via FTP.
In your FTP client, browse to the root of your WordPress installation, then browse to wp-content/themes. You will see a directory listing for all of your installed themes.
Upload the folder extracted in step 1 into the themes directory.
After the upload completed, log into your site’s WordPress Dashboard.
Click Appearances on the Dashboard menu.
You should see the theme you just uploaded. Click the Activate link below the theme to tell WordPress to use it to style your site.
Summary
Installing a new theme is a quick way to add some flair to your website. Just remember to install theme only from trusted sources. In another lesson we’ll talk about how to customize themes from within the WordPress dashboard and, later, how to get your hands dirty and customize your theme by editing it’s code!
https://www.reich-consulting.net/wp-content/uploads/2012/06/themes.jpg9251227Brian Reich/wp-content/uploads/2019/09/reich-web-consulting-logo-o.svgBrian Reich2012-06-24 19:47:042012-06-26 07:11:11Choosing and Installing WordPress Themes