404 Not Found: even if you’re not a web designer or a programmer you’ve probably seen this error before. But if you have been living underground in the disconnected world of the mole people for a few decades, 404 Not Found is the error code on the web that means you’ve tried to access a resource that doesn’t exist.
404 errors need to be dealt with. When a customer experiences a 404 it’s a missed opportunity for you and a bad user experience for them. When a search engine experiences a 404 error the missing resources could be removed from their index, and it could be translated as a signal that your website is unreliable.
But before you can fix a 404 Not Found error you need to know they’re happening. This article explore six easy ways to discover 404 errors on your own website.
1. Find 404 Errors Using Server Logs
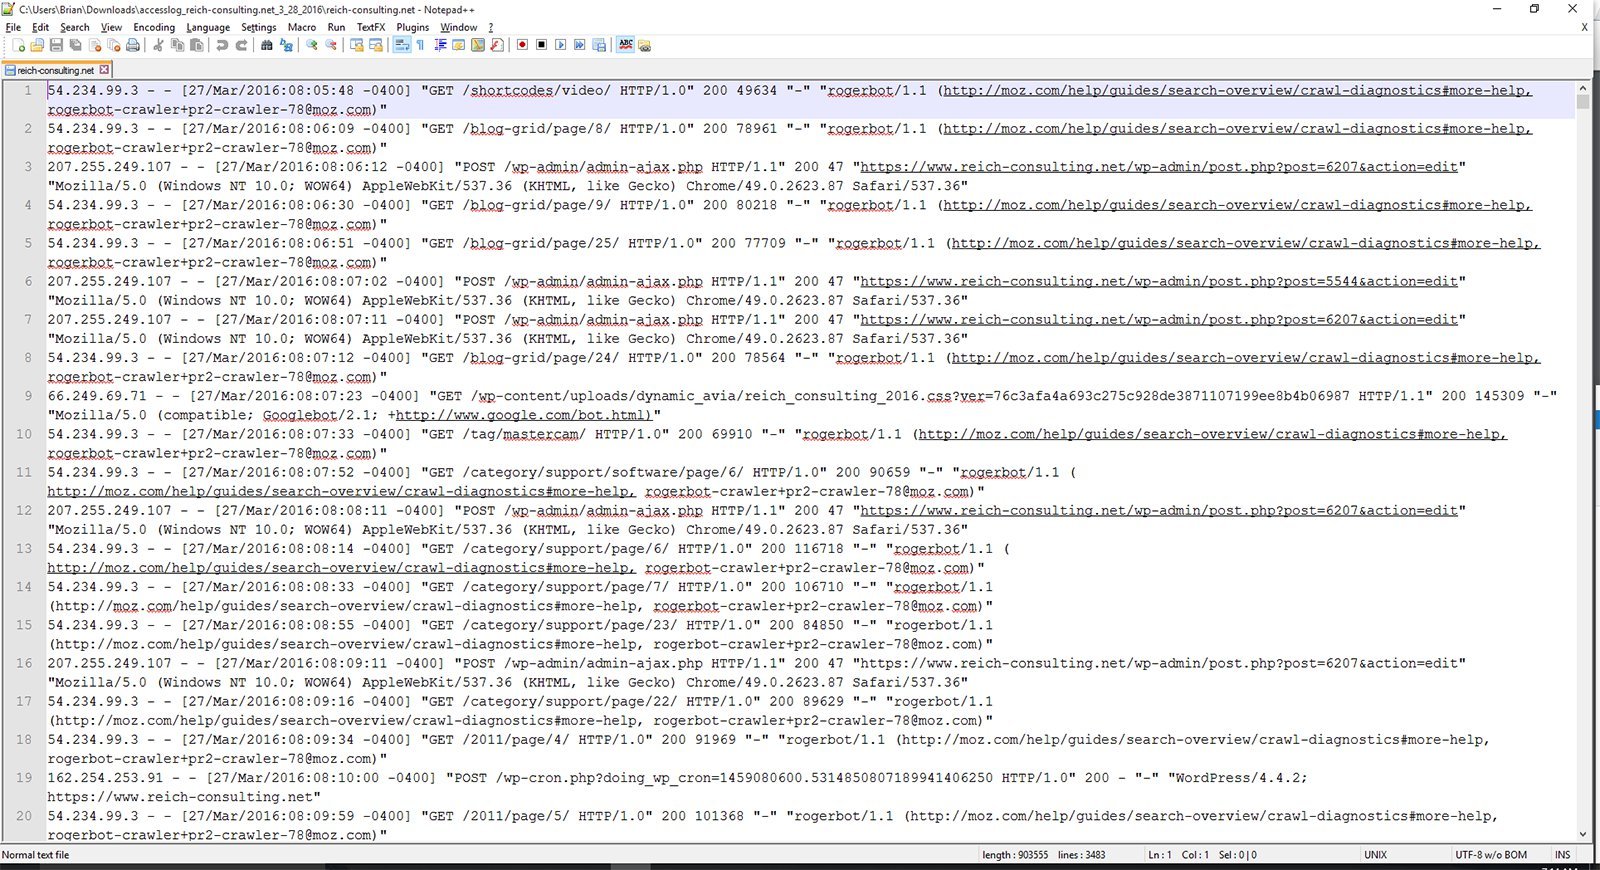
One of the easiest ways to discover 404 errors is by utilizing your hosting environment’s access logs and error logs. Every hosting environment is different so unfortunately I can’t explain where to find yours, but a Google search should prove fruitful. Searching for “cpanel raw access logs” turns up a plethora of helpful pages for the CPanel hosting environment.
Your log files may need some massaging to be useful. Most are text files that can be easily opened in Excel and then filtered by HTTP response code.
The Pros: This method should show you all 404 errors that occurred on your site in the time frame covered by the log.
The Cons: Your hosting environment’s log files can be difficult to read and utilize unless you know your way around a spreadsheet.
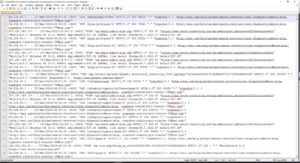
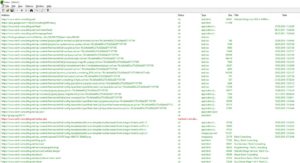
The raw access logs from this website. These file contain lots of data and need some help to be useful.
2. Find 404 Errors Using a Spider or Link Scanner
This method doesn’t actually find 404 errors. It discovers broken links on your website so they can be fixed before they generate 404 errors. An ounce of prevention is worth a pound of cure.
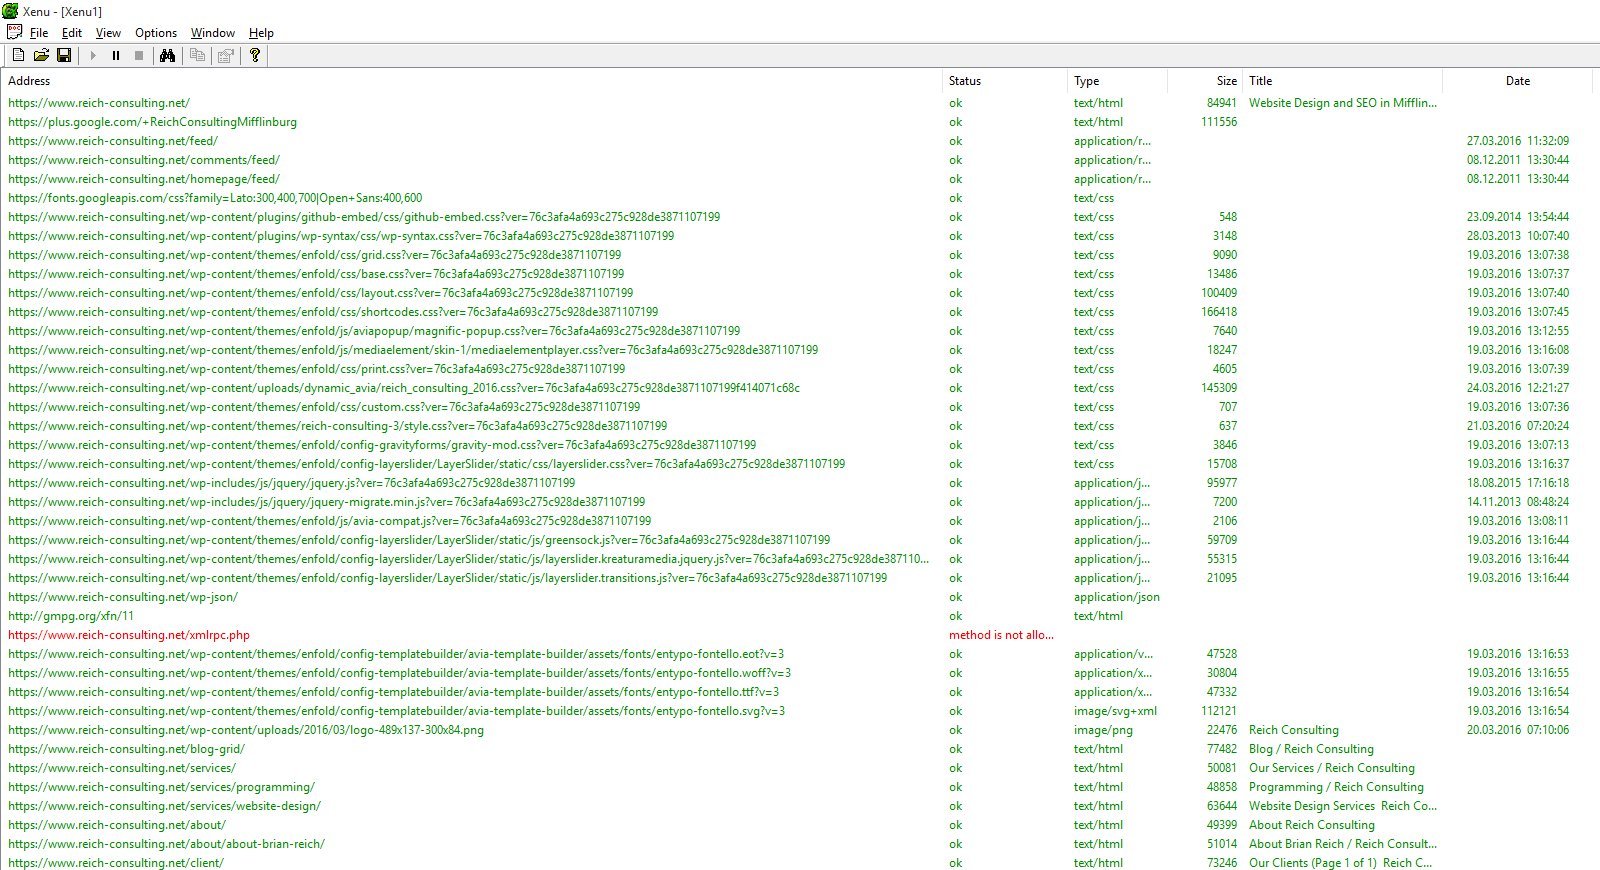
An easy way to find potential 404 errors is by scanning your website with a spider or link scanner. A spider indexes your site the same way that a search engine like Google does: it starts with a URL and scans the code for links, and then works through that list recursively. There are lots of programs and online services that can scan your site for free, and will provide a list of broken links that exist on your site. My two favorites are Xenu Link Sleuth and Screaming Frog SEO.
The Pros:
Using a spider to locate broken links on your website doesn’t actually find 404 errors: it helps prevent them. By scanning your site, discovering, and fixing broken links you’ll prevent your visitors from visiting URLs that don’t exist and reduce the number of 404 errors that occur on your website in the future.
The Cons:
Anyone can link to your website, and you don’t have control over the URLs that they link to. Just because you fix all of the broken links on your website doesn’t mean that other websites, or even search engines, don’t have active links to broken URLs on your website. You won’t be able to discover or fix those using a spider.
A report from Xenu Link Sleuth. Xenu requests every URL of your site and returns the status code, among other things.
3. Find 404 Errors Using Google Analytics (and Yoast SEO)
This one is a little WordPress-specific, but you can do a similar trick with other content management systems.
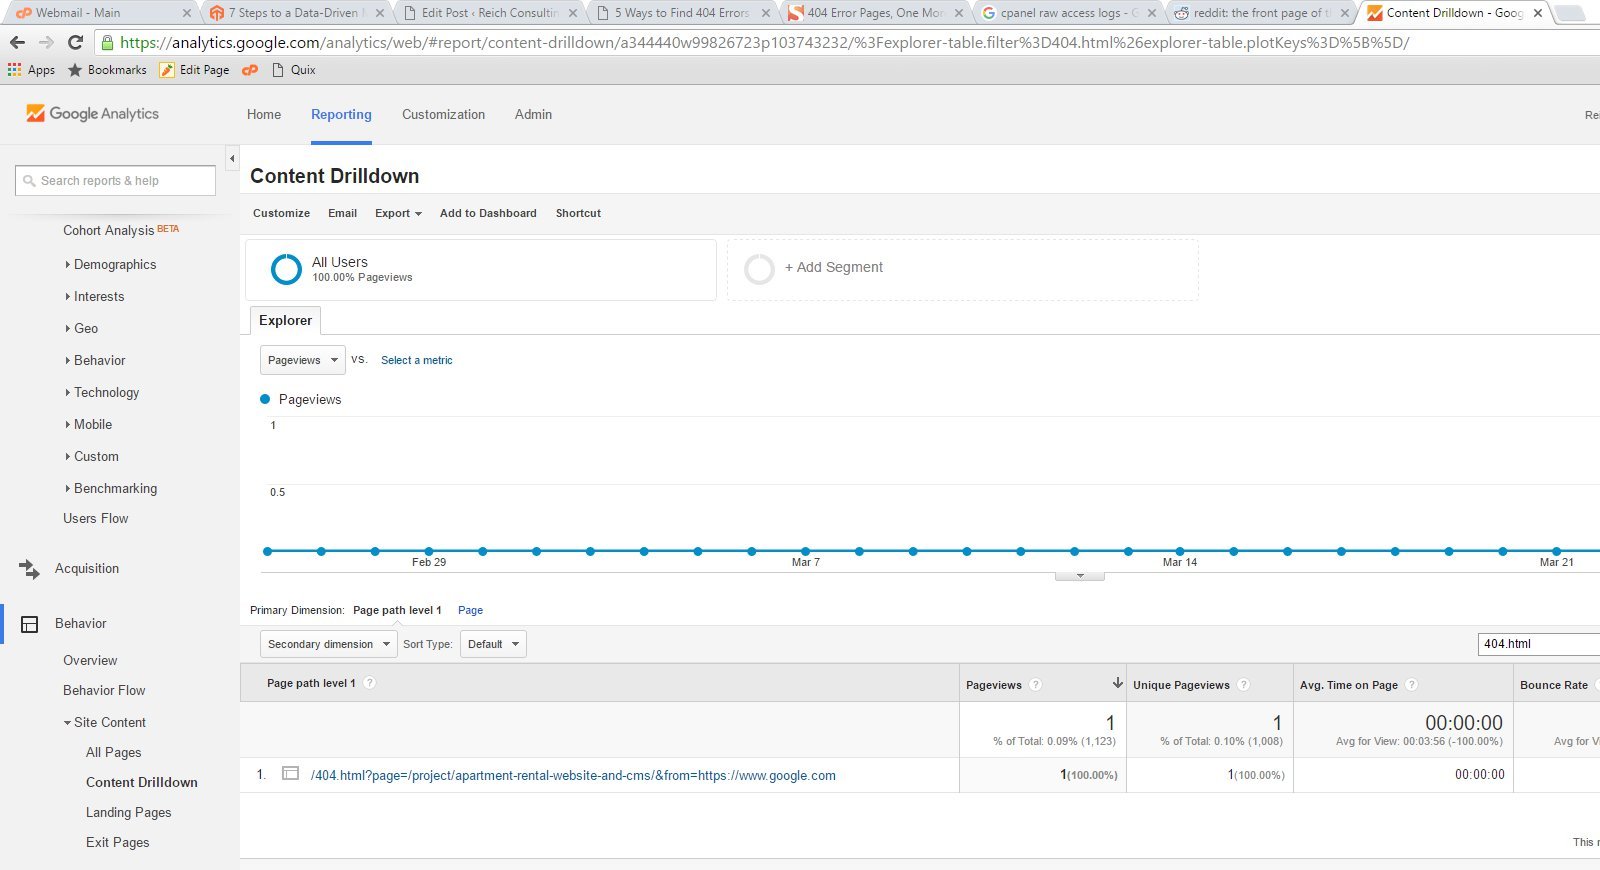
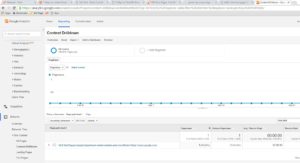
If you use the Google Analytics by Yoast plugin, it automatically tags 404 errors so you can find them in Google Analytics using the Content Drilldown tool. Just go to Behavior > Site Content > Content Drilldown and do a search for 404.html.
The Pros:
It’s right in Google Analytics where you would expect to find this sort of data. Because it’s in Google Analytics you can export your list of 404 errors to do something useful with it, like construct a list of URL to redirect.
The Cons:
It’s WordPress specific. It requires you to install yet another plugin on your website to basically embed a few lines of JavaScript for Google Analytics.
Yoast SEO automatically registers your 404 errors in Google Analytics.
4. Find 404 Errors Using Google Search Console
Google Search Console (formerly Google Webmaster Tools) provides a window into how Google sees your website. Under the Crawl Errors Google Search Console provides a list of all connection errors that occured while Google attempted to index your site.
The Pros:
Google regularly spiders your site and attempts to index any URLs that it finds, as well as any URLs it already had in it’s database. If any URL stops working, whether it’s new or historical, Google Search Console will let you know. These reports can be exported to CSV, so you can do something useful with them, like create a redirect list. This is also helpful because essentially Google Search Console is discovering broken links before actual humans are, so check regularly and act on it.
The Cons:
If you have any pages that you’ve intentionally prevented search engines from indexing either through robots.txt or through a noindex tag, Google will not index them and, therefore, not check to see if the links still work. Google Search Console only displays 404 errors generated by Google’s crawler and not actual users.

Using Google Analytics to Find 404 Errors
5. Find Errors Using SEO Redirection (or another 404 Management Plugin)
This tip is WordPress specific, but most content management systems have a similar feature or plugin.
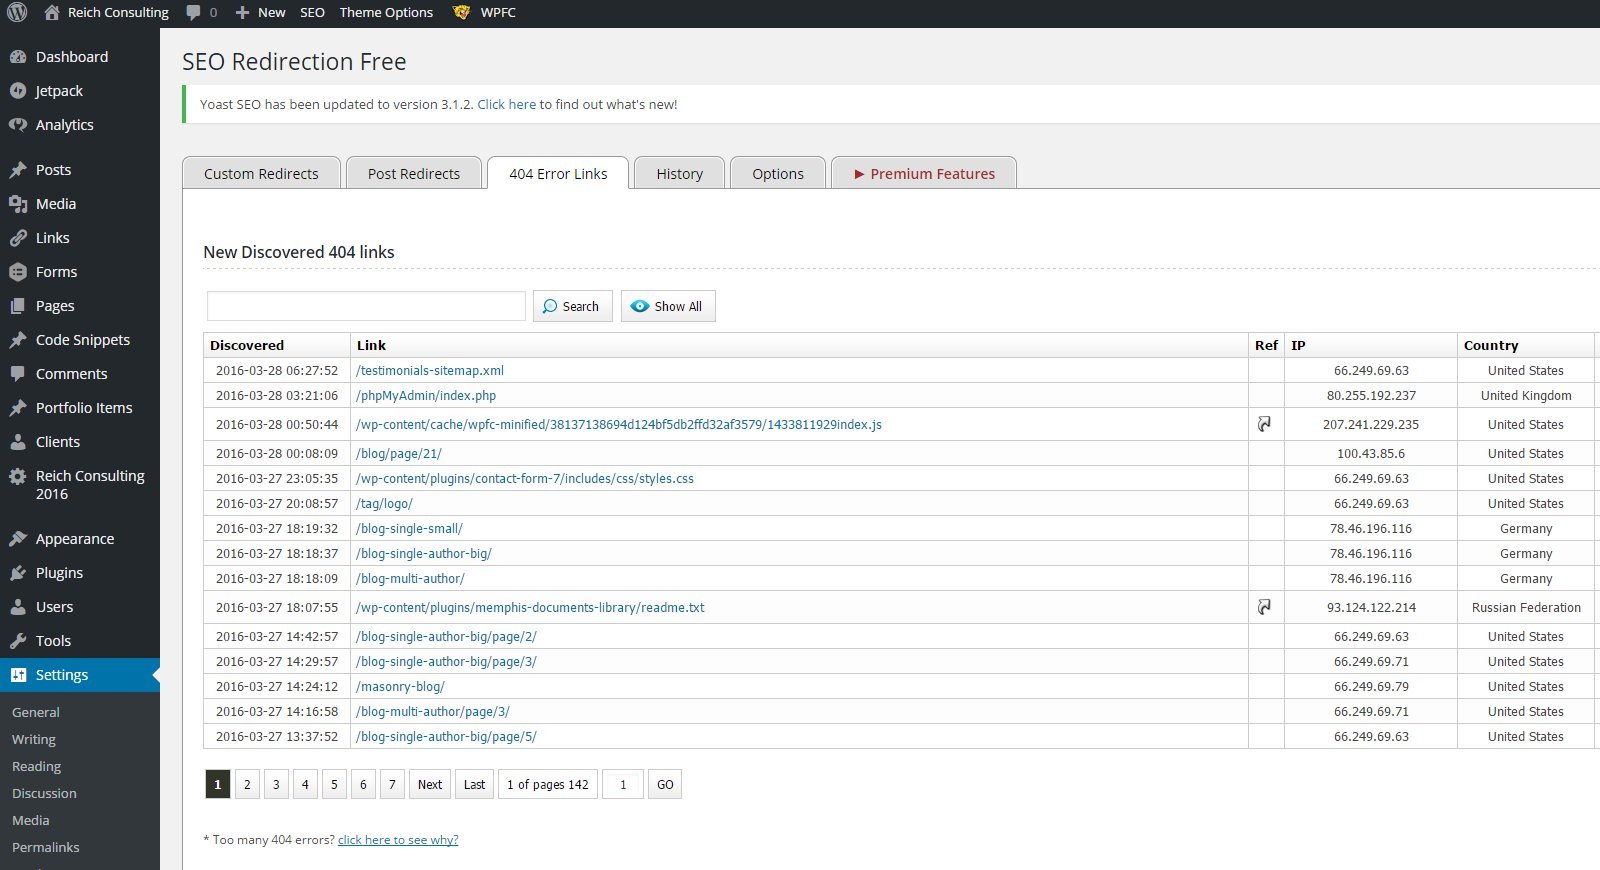
There are lots of plugins that can help you discover and fix 404 errors. I use SEO Redirection as well as it’s premium sibling, SEO Redirection Premium. These plugins track 404 errors that occur on your website and help you easily resolve them by redirecting the broken URL to an existing page. Yoast SEO’s premium version also has this feature built in. Yoast SEO Premium will hook up straight to your Google Search Console account, and allow you to redirect 404 errors discovered by Google from within the plugin.
The Pros:
WordPress can become your one-stop shop for discovering and dealing with 404 errors and broken links. And if you’re willing to pay for a premium plugin, you can really automate the process.
The Cons:
WordPress specific, and all of the problems that come with installing plugins. To make the most of this method you should purchase the premium version of one of these plugins. But trust me: they’re worth it.
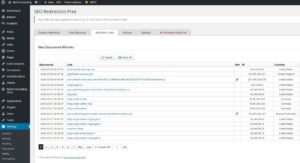
404 Errors Caught by SEO Redirection Premium
6. Find 404 Errors with Other Services
There are a host of other services that can help you discover 404 errors including OnPage.org and Moz. I only bring these up for the sake of thoroughness. There’s absolutely no reason you need to sign up for a paid service just to discover broken URLs and 404 errors, but these services do a lot more than that and are worth investigating.
The Pros:
Another set of eyes scanning your website for errors can’t be a bad thing. Plus these services offer far more than just 404 error reports.
The Cons:
Services like Moz don’t come cheap. So don’t use them unless you’re looking for more than just a 404 error detector.
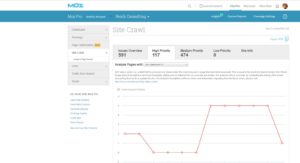
Moz 4xx Error Report
Summary
So what do I do? I use a combination of all of the methods above. A link scanner or spider like Xenu helps you proactively discover and fix broken links within your website, but can’t help you with links from other sources like other websites or Google. Google Analytics helps you discover URLs that are actually breaking as people attempt to view them. Google Search Console helps you discover broken links that Google either has in their index, or is trying to index. WordPress plugins like SEO Redirection and Yoast SEO Premium help me easily deal with 404 errors as I discover them. And of course, I already use Moz for other reasons, so I take it’s 404 report into consideration as well.
In another post, I’ll be talking about how to handle 404 errors on your WordPress website once you find them. Stay tuned!