SEO stands for search engine optimization. Reich Web Consulting provides organic search engine organization services as well as local search optimization.

Yoast Basic SEO Online Course Review

Brian Reich successfully completed the Yoast Basic SEO course!
Today I completed the Yoast Basic SEO course from Yoast Academy. Yoast is synonymous with WordPress SEO. In fact, they’ve developed the WordPress SEO plugin that’s used on every website I develop (and any WordPress site where the author cares about SEO).

Being a fan of their free and premium WordPress plugins, I was curious when they started offering training and signed up almost immediately.

The Cost

Yoast Basic SEO cost me $200.  Since my purchase they’ve run several specials, so subscribe to their mailing list and watch for discounts. Given the amount of content you get in this course I think $200 is a fair price to ask. It doesn’t contain any information you can’t find somewhere else, but the Yoast team has done a great job of covering all of the basics of search engine optimization in one simple, easy to follow package.

The Material

The Yoast Basic SEO course covers the basics of search engine optimization.

The course starts with a primer on keyword research. After all: how can you optimize your site until you know what keywords and key phrases you want to optimize for?

Next the Yoast team introduces you to technical SEO. The course discusses the basics of making sure that your website is crawlable, findable, and usable by search engines and, more importantly, the humans that use them.

Next the course covers SEO copywriting (popularly called Content SEO). This section explores how to write for the web in a way that’s visually and intellectually interesting while feeding search engines what they need to understand and rank your content. The Content SEO portion of the training relies heavily on the fact that Google’s goal is to give the best ranking to content that best answer’s a user’s query.

Finally Yoast Basic SEO covers UX and Conversion Optimization. This section helps you understand how users interact with the web and how you can use common design patterns to nudge visitors toward the actions you hope they’ll take. Conversion Optimization involves formulating hypotheses about how users will respond to changes in your content, and then testing those ideas to maximize your conversion rates.

Final Thoughts

I really enjoyed the Yoast Basic SEO course. I’d recommend it to folks who would like to know more about SEO and how to effectively handle the SEO necessities of their own blogs and websites.

Individuals that already have a strong foundation in SEO will find it lacking, and maybe even a little shallow. After all: Yoast’s SEO recommendations are often based on what Google tells us they’re doing, and not necessarily the reality of what can get a site ranked for a particular keyword. Yoast’s courses are built around the idea that Google rewards the content that answers a user’s query most effectively and accurately. But we’re all aware that there are professional SEO’s still effectively gaming that system.

Yoast Basic SEO provides exactly what it advertises: basic SEO knowledge. Yoast Basic SEO is the beginning of the journey and not the destination. If you need to quickly get from SEO novice to a working knowledge of the terms and ideas behind search engine optimization then this course will serve you well.

Six Ways to Find 404 Errors On Your Website

404 Not Found: even if you’re not a web designer or a programmer you’ve probably seen this error before. But if you have been living underground in the disconnected world of the mole people for a few decades, 404 Not Found is the error code on the web that means you’ve tried to access a resource that doesn’t exist.

404 errors need to be dealt with. When a customer experiences a 404 it’s a missed opportunity for you and a bad user experience for them. When a search engine experiences a 404 error the missing resources could be removed from their index, and it could be translated as a signal that your website is unreliable.

But before you can fix a 404 Not Found error you need to know they’re happening. This article explore six easy ways to discover 404 errors on your own website.

1. Find 404 Errors Using Server Logs

One of the easiest ways to discover 404 errors is by utilizing your hosting environment’s access logs and error logs. Every hosting environment is different so unfortunately I can’t explain where to find yours, but a Google search should prove fruitful. Searching for “cpanel raw access logs” turns up a plethora of helpful pages for the CPanel hosting environment.

Your log files may need some massaging to be useful. Most are text files that can be easily opened in Excel and then filtered by HTTP response code.

The Pros: This method should show you all 404 errors that occurred on your site in the time frame covered by the log.

The Cons: Your hosting environment’s log files can be difficult to read and utilize unless you know your way around a spreadsheet.

The raw access logs from this website. These file contain lots of data and need some help to be useful.

The raw access logs from this website. These file contain lots of data and need some help to be useful.

2. Find 404 Errors Using a Spider or Link Scanner

This method doesn’t actually find 404 errors. It discovers broken links on your website so they can be fixed before they generate 404 errors. An ounce of prevention is worth a pound of cure.

An easy way to find potential 404 errors is by scanning your website with a spider or link scanner. A spider indexes your site the same way that a search engine like Google does: it starts with a URL and scans the code for links, and then works through that list recursively. There are lots of programs and online services that can scan your site for free, and will provide a list of broken links that exist on your site.  My two favorites are Xenu Link Sleuth and Screaming Frog SEO.

The Pros:

Using a spider to locate broken links on your website doesn’t actually find 404 errors: it helps prevent them.  By scanning your site, discovering, and fixing broken links you’ll prevent your visitors from visiting URLs that don’t exist and reduce the number of 404 errors that occur on your website in the future.

The Cons:

Anyone can link to your website, and you don’t have control over the URLs that they link to. Just because you fix all of the broken links on your website doesn’t mean that other websites, or even search engines, don’t have active links to broken URLs on your website. You won’t be able to discover or fix those using a spider.

A report from Xenu Link Sleuth. Xenu requests every URL of your site and returns the status code, among other things.

A report from Xenu Link Sleuth. Xenu requests every URL of your site and returns the status code, among other things.

3. Find 404 Errors Using Google Analytics (and Yoast SEO)

This one is a little WordPress-specific, but you can do a similar trick with other content management systems.

If you use the Google Analytics by Yoast plugin, it automatically tags 404 errors so you can find them in Google Analytics using the Content Drilldown tool. Just go to Behavior > Site Content > Content Drilldown and do a search for 404.html.

The Pros: 

It’s right in Google Analytics where you would expect to find this sort of data. Because it’s in Google Analytics you can export your list of 404 errors to do something useful with it, like construct a list of URL to redirect.

The Cons:

It’s WordPress specific. It requires you to install yet another plugin on your website to basically embed a few lines of JavaScript for Google Analytics.
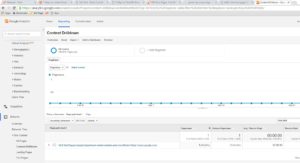
Yoast SEO automatically registers your 404 errors in Google Analytics.

Yoast SEO automatically registers your 404 errors in Google Analytics.

4. Find 404 Errors Using Google Search Console

Google Search Console (formerly Google Webmaster Tools) provides a window into how Google sees your website. Under the Crawl Errors Google Search Console provides a list of all connection errors that occured while Google attempted to index your site.

The Pros:

Google regularly spiders your site and attempts to index any URLs that it finds, as well as any URLs it already had in it’s database. If any URL stops working, whether it’s new or historical, Google Search Console will let you know.  These reports can be exported to CSV, so you can do something useful with them, like create a redirect list. This is also helpful because essentially Google Search Console is discovering broken links before actual humans are, so check regularly and act on it.

The Cons:

If you have any pages that you’ve intentionally prevented search engines from indexing either through robots.txt or through a noindex tag, Google will not index them and, therefore, not check to see if the links still work. Google Search Console only displays 404 errors generated by Google’s crawler and not actual users.
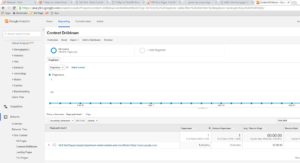
Using Google Analytics to Find 404 Errors

Using Google Analytics to Find 404 Errors

5. Find Errors Using SEO Redirection (or another 404 Management Plugin)

This tip is WordPress specific, but most content management systems have a similar feature or plugin.

There are lots of plugins that can help you discover and fix 404 errors. I use SEO Redirection as well as it’s premium sibling, SEO Redirection Premium. These plugins track 404 errors that occur on your website and help you easily resolve them by redirecting the broken URL to an existing page. Yoast SEO’s premium version also has this feature built in. Yoast SEO Premium will hook up straight to your Google Search Console account, and allow you to redirect 404 errors discovered by Google from within the plugin.

The Pros:

WordPress can become your one-stop shop for discovering and dealing with 404 errors and broken links. And if you’re willing to pay for a premium plugin, you can really automate the process.

The Cons:

WordPress specific, and all of the problems that come with installing plugins. To make the most of this method you should  purchase the premium version of one of these plugins. But trust me: they’re worth it.
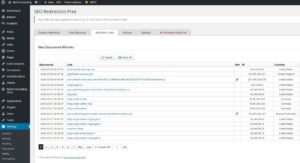
404 Errors Caught by SEO Redirection Premium

404 Errors Caught by SEO Redirection Premium

6. Find 404 Errors with Other Services

There are a host of other services that can help you discover 404 errors including OnPage.org and Moz. I only bring these up for the sake of thoroughness. There’s absolutely no reason you need to sign up for a paid service just to discover broken URLs and 404 errors, but these services do a lot more than that and are worth investigating.

The Pros:

Another set of eyes scanning your website for errors can’t be a bad thing. Plus these services offer far more than just 404 error reports.

The Cons:

Services like Moz don’t come cheap. So don’t use them unless you’re looking for more than just a 404 error detector.
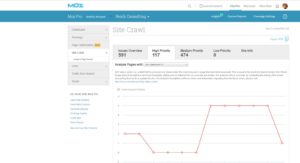
Moz 4xx Error Report

Moz 4xx Error Report

Summary

So what do I do?  I use a combination of all of the methods above. A link scanner or spider like Xenu helps you proactively discover and fix broken links within your website, but can’t help you with links from other sources like other websites or Google. Google Analytics helps you discover URLs that are actually breaking as people attempt to view them. Google Search Console helps you discover broken links that Google either has in their index, or is trying to index. WordPress plugins like SEO Redirection and Yoast SEO Premium help me easily deal with 404 errors as I discover them. And of course, I already use Moz for other reasons, so I take it’s 404 report into consideration as well.

In another post, I’ll be talking about how to handle 404 errors on your WordPress website once you find them. Stay tuned!

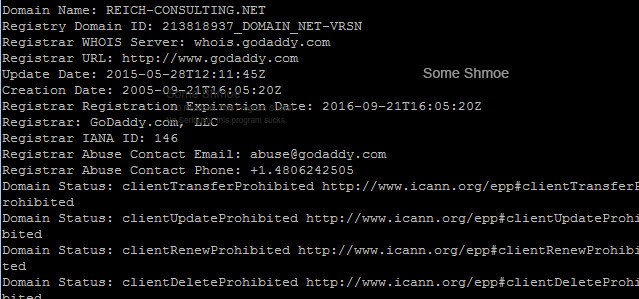
This image shows a WHOIS report of my domain, along with registration and expiration dates that may or may not affect search engine ranking.

Does Domain Expiration Affect Search Engine Ranking?

Some SEO’s have claimed for years that the length of time for which a domain is registered can impact a site’s search engine ranking. The theory is that domains registered for longer periods of time give Google a signal that they’re in it for the long-haul and are rewarded. Sites that re-register their domain ownership annually give Google a signal that they may be temporary and potentially spammy.

Domain registrars have latched on to this theory in order to make easy sales by claiming that multi-year registrations will provide an SEO rank boost.

But does the claim that domain expiration affects search engine ranking hold any weight?

The Truth: Domain Expiration (Probably) Doesn’t Effect SEO

The Domain Expiration SEO Myth was born from concern over a patent held by Google related to ranking websites based on historical data. Multiple representatives from Google have stated on several occasions that domain expiration it not a major ranking factor. Matt Cutts (formerly of Google) states,

The answer is to not worry about it that much… not very much at all in fact.

Google’s own John Mueller says,

A bunch of TLDs do not publish expiration dates — how could we compare domains with expiration dates to domains without that information? It seems that would be pretty hard, and likely not worth the trouble. Even when we do have that data, what would it tell us when comparing sites that are otherwise equivalent? A year (the minimum duration, as far as I know) is pretty long in internet-time :-)

Cutts’ and Mueller’s answers leaves the door open to domain expiration being a factor, albeit a small one. A former member of Yahoo’s search team claims that domain expiration does matter.

In a Moz forum discussion one individual points out that any relationship between high-ranking sites and domain registration lengths is likely correlation, not causation. Sites with longer registration lengths are more likely to be mature sites with more resources allocated to optimization and producing quality content, and therefore have a higher ranking. But the length of registration isn’t a ranking factor itself: it’s just along for the ride.

Myth Status: “Eh… Maybe?”

With Google’s official stance being “don’t worry about it” with a side of ambiguity, and claims from other sources saying domain expiration could play a factor, we can’t mark this myth “busted.”  The best we can say is that domain expiration could play a small factor. With that in mind, maybe it’s time to consider other reasons to register our domains for longer periods. Here are a few of those reasons.

Longer Domain Registrations Often Come with Price Breaks

Registering a domain for multiple years at a time is often cheaper than re-registering the same domain year-after-year. Who doesn’t love saving money?

Longer Domain Registrations Means You’ll Save Time

Registering a domain for multiple years takes exactly as much time as registering for a single year.  You’ll save yourself literally tens of seconds annually by registering for several years at a time. Plus you won’t look foolish if you forget to re-register. Which leads us to the most important reason of all.

Missing Domain Renewal May Affect Your Ranking

Forgetting to renew your domain is embarrassing and costly. Even if you don’t forget to renew, other individuals could beat you to it and snipe your domain out from under you. There have been several high-profile instances of this happening.

Losing your domain even temporarily could have some pretty tragic effects on your site’s SEO. Googlebot and other spiders don’t take kindly to unavailable content, and even the slightest outage could leave you with long-term SEO ramifications.

Consider the implications of your register redirecting your domain to some default splash page and 404’ing every single one of your URL’s that Google has in their index.

Making sure your domain remains yours well into the future can eliminate this rare but potentially costly pain point.

Longer Domain Registrations: Better Safe Than Sorry

My parting wisdom would be this: unless your registering a domain you have no intention of using for more than a year, there’s no good reason not to purchase multiple years of domain registration. You’ll be protected from having your domain sniped. You’ll save some time and potentially some money. And on the off-chance that Google does look at domain registration and expiration dates as a ranking factor, you’ll get that ranking boost and avoid any potential penalty.

Resources:

How to Add a Business to CitySearch

I’m in the process of doing some link-building for my business, and I noticed that some of my local competitors are listed in city and business listings that I’m not.  One is called CitySearch.

I debated whether or not it was worth the effort to get listed in this type of local business directory. In the end I decided I should. First off, my competition is there and I’m not.  Second, there is some SEO benefit to being listed in business and location-specific directories, since they often manage to rank higher for key search terms than the businesses in the listings they provide. So if folks search for “computer repair in mifflinburg” and get local business directories first, I probably want to be there.

CitySearch doesn’t have an Add Your Business button. So How, pray tell, do you get into their business listings?

How to Add a Business to CitySearch

According to CitySearch’s FAQ (now hidden away at the bottom of their About Us page),

Citysearch partners with InfoUSA for local business data. They offer an Express Update service that allows merchants to update their listing data as well as add new businesses. Once you’ve added your business please allow 1 – 2 months for the information to be on Citysearch. Find out more at: http://www.expressupdateusa.com. CitySearch FAQ

Once you discover this little nugget of truth, getting listed is actually pretty easy.  Follow the instructions below.

  1. Go to ExpressUpdate and create an account. If you’re like me and totally distrust services like this you’ll be wise to use a junk email account to register. Don’t worry: you can associate a different email address with the actual business listing.
  2. After you’ve registered go back to the home page and search for your business. If it finds it, great! Claim your business and make any changes it requires to keep it current. If not, follow along.
  3. If the search didn’t find your business, you’ll see a link to Add it Now. Click that link and you’ll be provided with a form to add all of you business information. Once that’s completed, you’ll have to verify via phone that you have permission to manage the directory listing for this business.
  4. After phone verification your listing will go into a verification state. Mine took a few hours, but eventually it was ready for me to claim.
  5. Go back to ExpressUpdate, login, and on your dashboard you’ll see a table of business listings you manage. Go ahead and click Claim. It will give you a phone number to call to complete the process.