
How to Use MailChimp RSS-to-Email with WordPress
This post will teach you how to leverage MailChimp RSS-to-Email campaigns to notify subscribers when you update your WordPress blog.
Bloggers depend on a variety of channels to notify their fans when they post new content. This includes RSS feeds, social, and in-browser notifications, and the topic of this post: email subscriptions. Bloggers using the WordPress platform often depend on the Jetpack Subscription plugin to do the heavy lifting. Jetpack leverages WordPress.com to manage lists, construct, and deliver notifications to subscripers. And it works. Kind of. But Jetpack’s Blog Subscription plugin can only take you so far. It’s insanely rigid, more or less impossible to customize, and really not a great experience for your customers. It just doesn’t feel like a professional solution. So what does? Try using MailChimps RSS-to-Email feature. All you need is an active MailChimp account and the ability to make some minor changes to your WordPress site.
How to Integrate MailChimp RSS-to-Email with WordPress
Obviously you need a MailChimp account to get started. So if you don’t already have one, go ahead and register for a free account now.
In order to setup MailChimp Blog Subscriptions, you first need to create a list to hold your blog subscribers. Read Create a New List to learn all about Lists on MailChimp and how to create them.
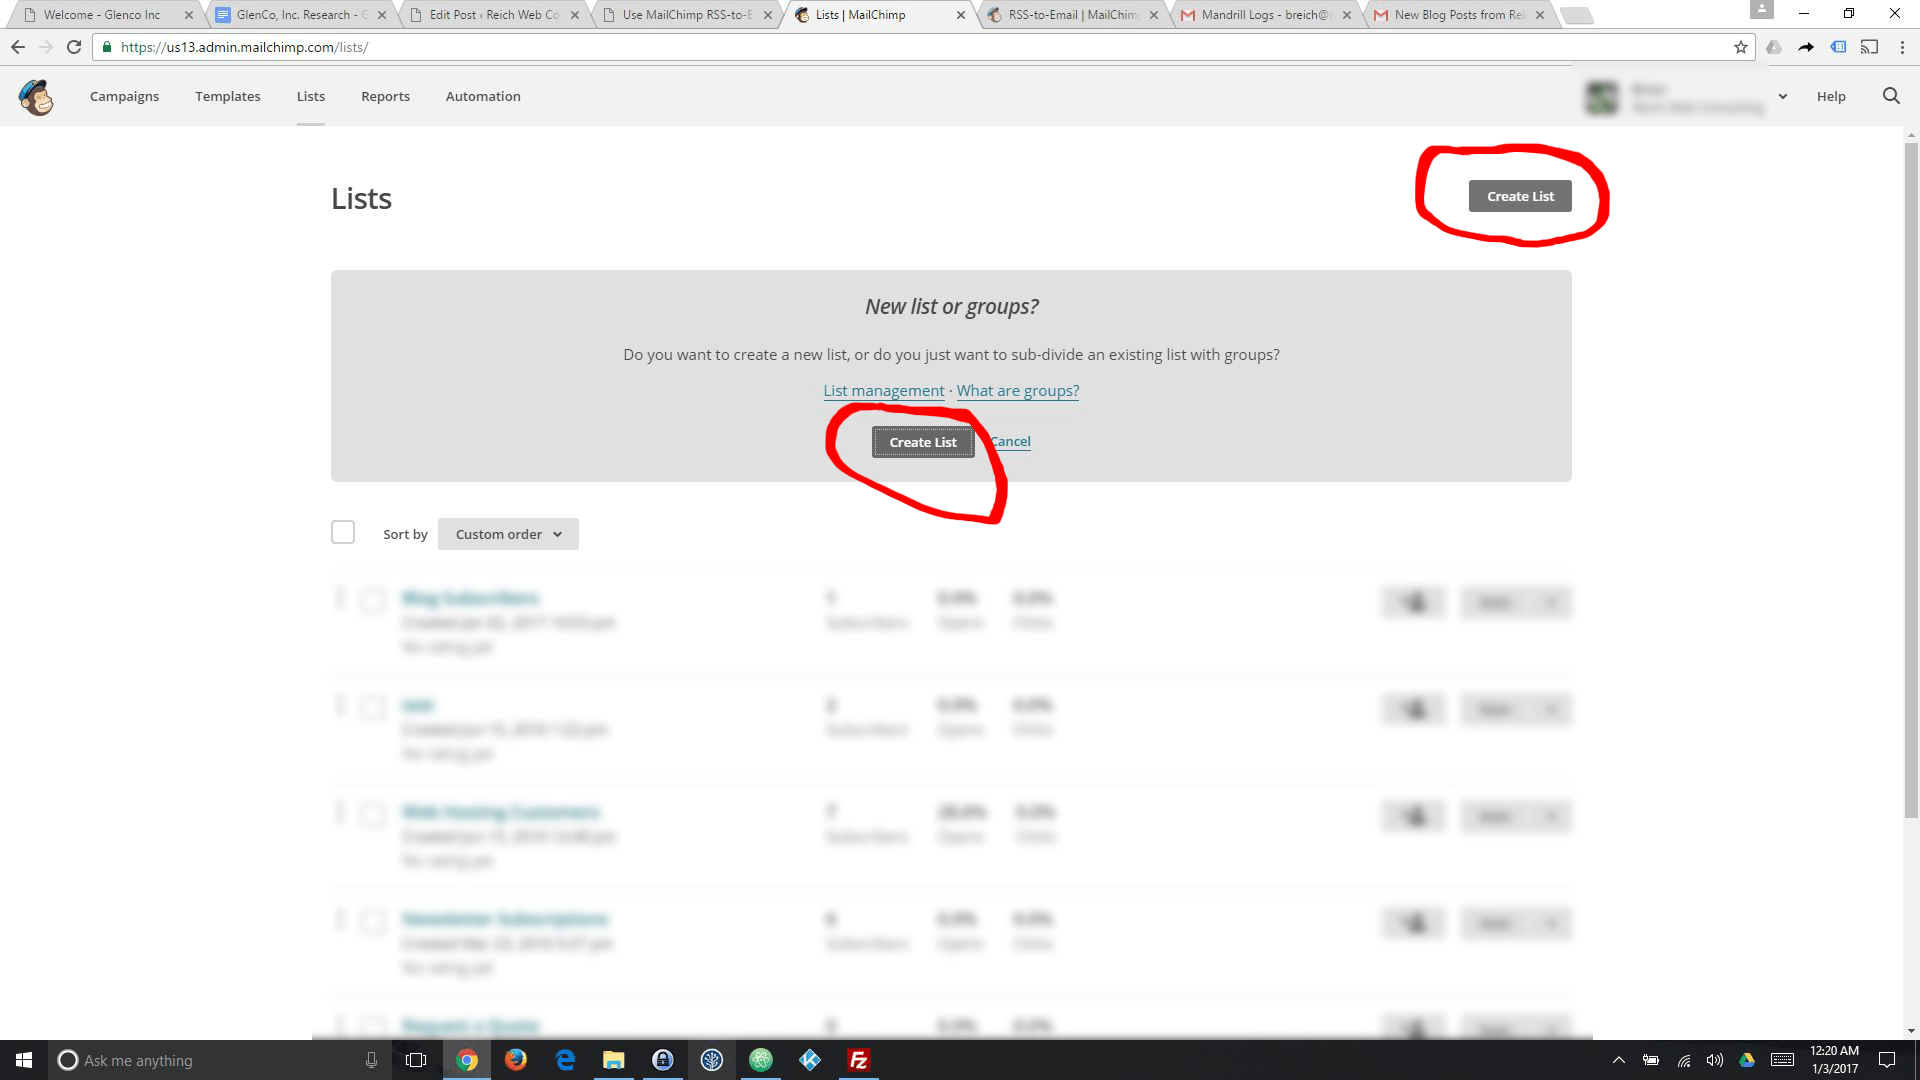
First, create a new list in MailChimp to store your blog subscribers
Create a MailChimp Form to Add Subscribers
Now that you’ve created your Blog Subscribers list you need a way to for users to add themselves to the list. In other words you need a Blog Subscription form. There are a number of ways you can do this.
You can of course manually code a form and the requisite client and server-side code to send submissions to MailChimp. The code to do this is not complex, but it’s also well above the skill of the average non-technical WordPress user. But if you do go this route I applaud your efforts!
The second option is to use the sign-up form options provided by MailChimp. On your Lists Management screen you’ll see a drop-down menu to the right of each list, and under that menu you’ll see Sign-Up Forms. The Sign-Up Forms option provides a variety of customizable forms that you can copy and paste into your website.
Finally, you can use a WordPress plugin like MailChimp for WordPress which will help you easily integrate your lists with your website. If you happen to be using Gravity Forms they have a terrific MailChimp add-on as well.
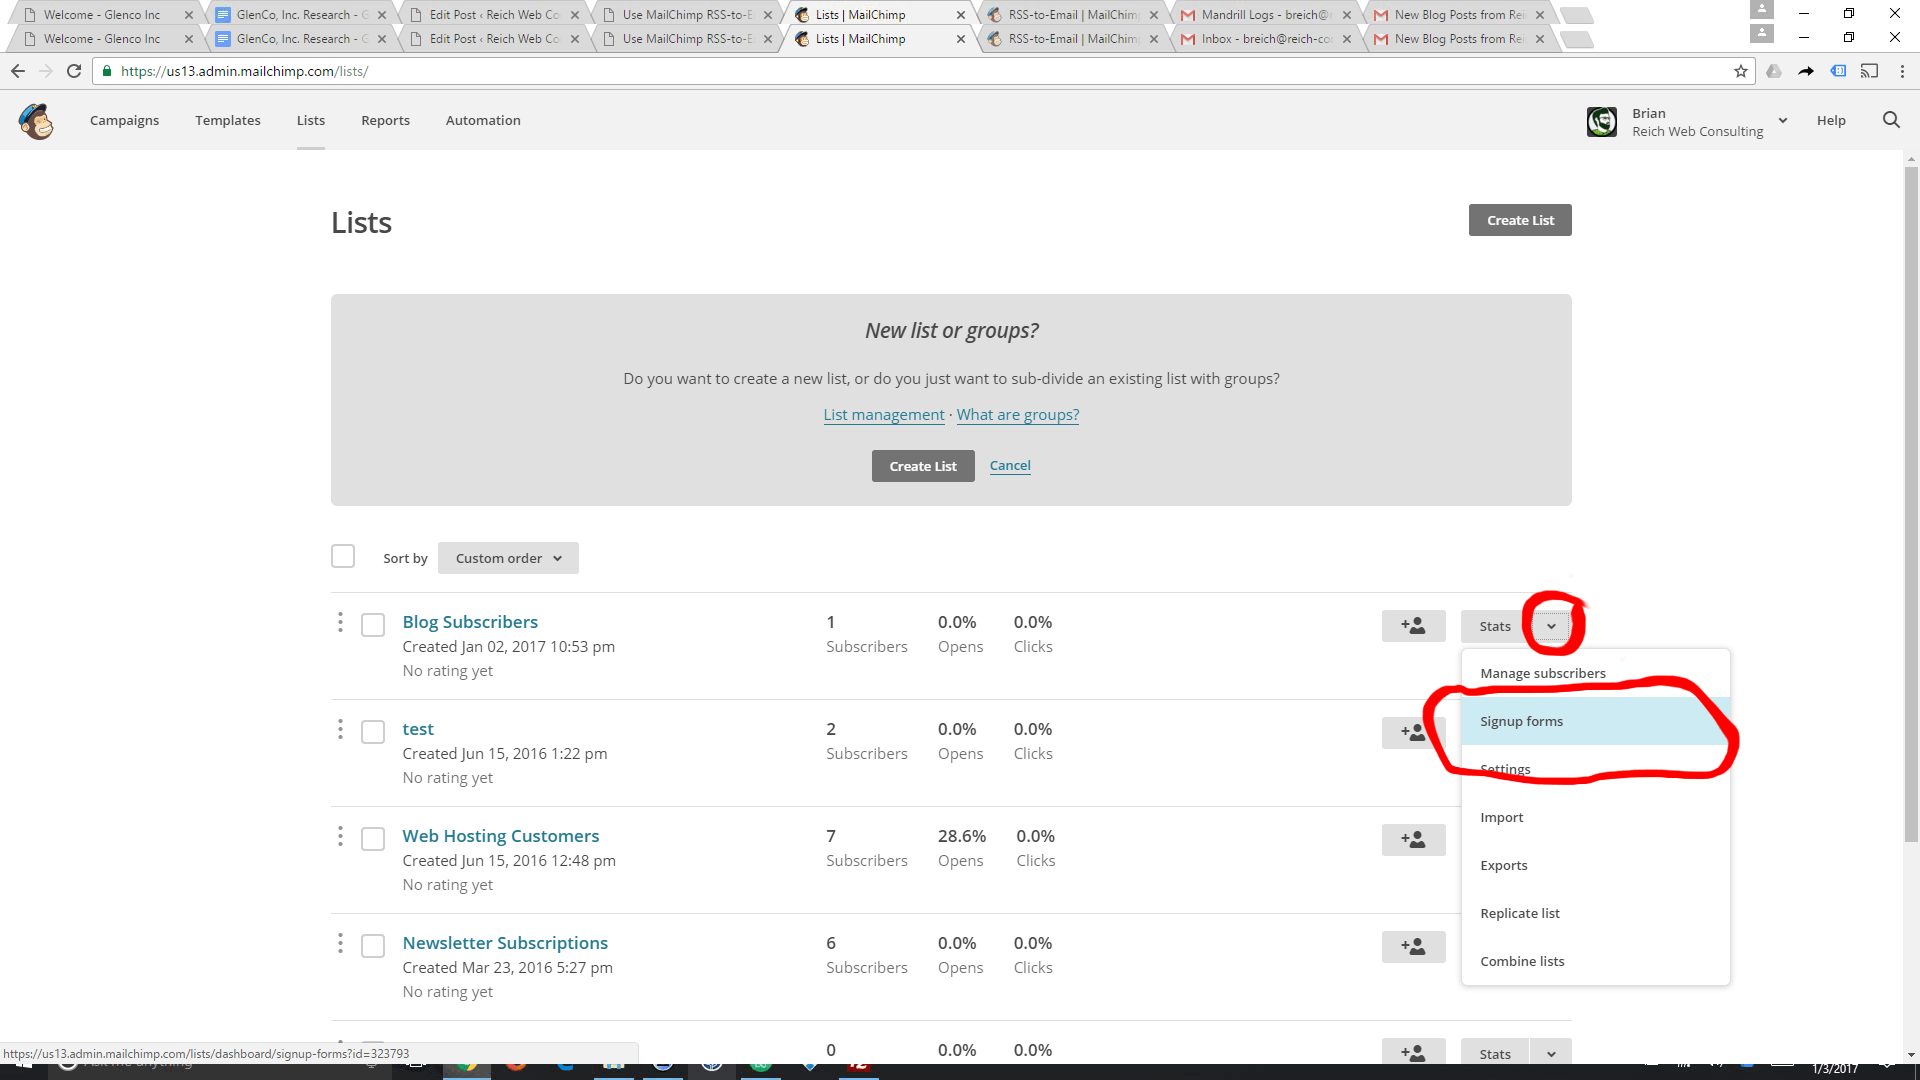
Use the MailChimp Signup Forms tool to create forms that you can easily embed in your site.
Setup an RSS-to-Email Campaign
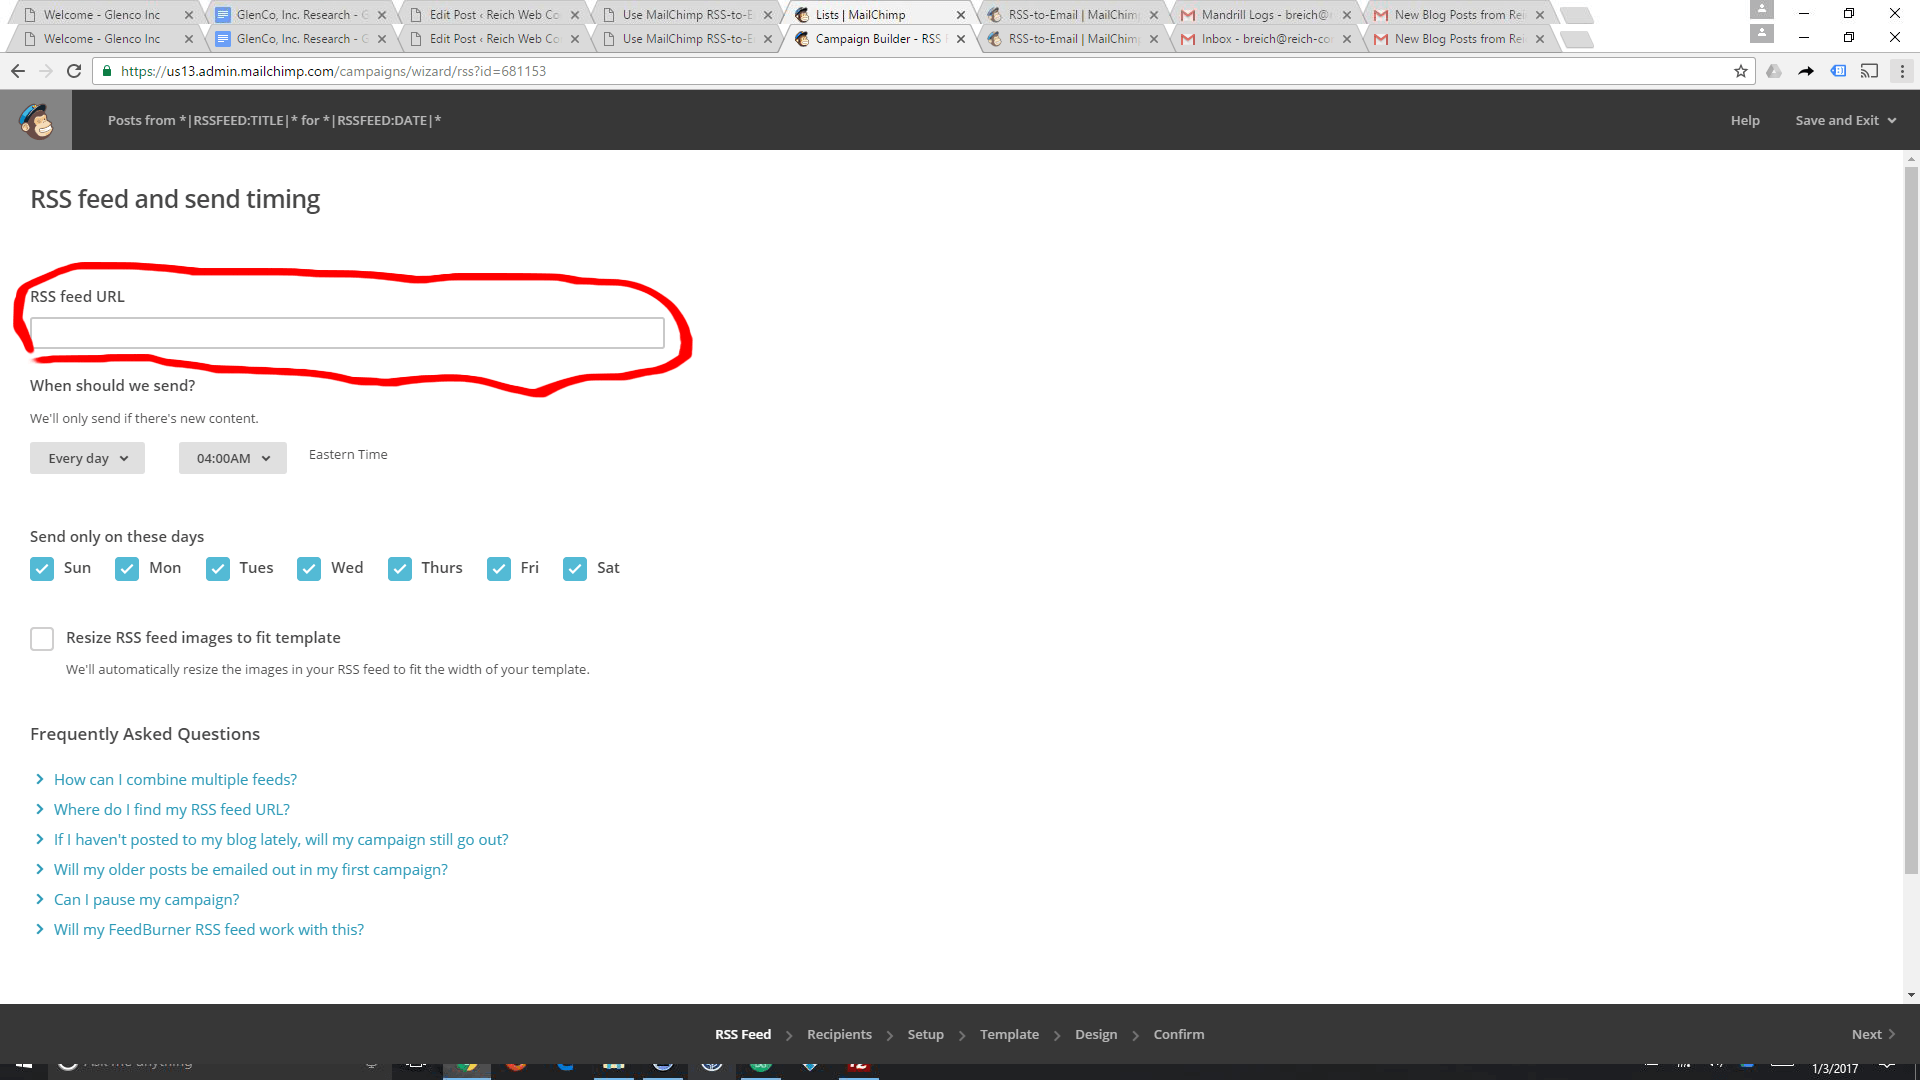
The final step required to get MailChimp to email your subscribers when you update your blog is to setup an RSS-to-Email Campaign. To setup an RSS-to-Email Campaign click the Campaigns tab, and then click the dropdown next to Create Campaign and choose RSS Campaign. Unless you’re using a plugin which overrides the default RSS feed for your site, your RSS feed URL should be http://yoursite.com/?feed=rss2 where http://yoursite.com is the site address you have configured in WordPress.
After you add your RSS feed address, you can configure a schedule for how often your RSS feed will be scanned for new posts. Unlike JetPack Subscriptions, MailChimp cannot send out updates as soon as you update your blog, and this is probably it’s greatest failing at the moment. However you can schedule daily, weekly, and even monthly emails.
Setting up the template for RSS-to-Email is just as easy as setting up any other mailing in MailChimp. Simply drag the RSS Header and RSS Items widgets onto the template, and you’re ready to go.
After you’ve created your list and added a signup form to your site, create a MailChimp RSS-to-Email Campaign to tie it all together.
Pros and Cons
The benefits of using MailChimp RSS-to-Email campaigns over Jetpack Subscriptions are obvious. You have full control over the process, what emails your subscribers receive, what they look like, and what they contain. On a recent project which used Jetpack Subscriptions, the client was very frustrated with the limited control we had over the emails being sent to her subscribers. This is actually the situation that led to me investigating MailChimp RSS-to-Email.
The cons are a little less obvious. Jetpack Subscriptions have the benefit of being tied directly to your WordPress install. This means that Jetpack can do it’s thing as soon as you publish a new blog post. Your MailChimp Campaign isn’t directly connected to WordPress. When you setup your campaign you tell MailChimp a time and a schedule at which it should check your RSS feed for updates. MailChimp will generate and send your mailings only on the designated schedule and not on-demand. If that’s a deal-breaker, then MailChimp RSS-to-Email may not be the solution for you. However I would hope that they make this available in the future.